

The Best Time of Day for Real Estate Photography: Golden Hour Tips
The art of Real Estate Photography involves more than just pointing a camera and snapping a picture. It’s about capturing the essence of a property, highlighting its best features, and creating a visual narrative that attracts potential buyers. A critical factor in achieving this is understanding the power of natural light and, more specifically, mastering the golden hour. This period of soft, warm light can transform ordinary homes into captivating showcases, making it a favorite among real estate photographers.
Understanding the Magic of Golden Hour
The Best Time of Day for Real Estate Photography
The golden hour, the period shortly after sunrise and shortly before sunset, is revered by photographers of all genres. However, it holds particular significance in real estate photography. Unlike the harsher, direct light of midday, the golden hour casts a soft glow, wrapping properties in a warm, inviting ambiance. This light evens out shadows, reduces harsh contrasts, and enhances the textures and colors of both the interior and exterior of a home. There’s a tangible difference in the quality and feeling of images taken during this time, which directly impacts how a property is perceived. It’s not merely about aesthetics; it’s about creating an emotional connection with potential buyers, making them envision themselves living in that space.
The Physics of Perfect Light
The reason for the golden hour’s unique lighting conditions lies in physics. During midday, the sun’s rays are direct, resulting in intense, harsh shadows and often overexposed highlights. However, during the golden hour, the sun is low on the horizon. This means its light travels through more of the Earth’s atmosphere before reaching us. As it does, the shorter blue wavelengths of light get scattered away, leaving the longer, warmer hues of red, orange, and yellow. This scattering process also softens the light, creating a gentler, more flattering illumination that brings out the best in any subject, especially real estate. The absence of harsh shadows allows for a more balanced image, revealing the details and nuances of a property that would otherwise be lost. This softer lighting is forgiving, meaning imperfections are less noticeable, and it enhances the color vibrancy of everything from the lush green of the lawn to the deep wood tones of furniture. From a photographic perspective, this makes the golden hour an ideal time to capture the true essence and appeal of a home.
This isn’t merely about the way the sun looks. The effect of golden hour transcends basic illumination. The lower angle the sun creates long, soft shadows, adding depth and three-dimensionality to images. This dimension is key for real estate photography because a property needs to be presented in a way that seems realistic and not flat or two-dimensional. Those gentle shadows allow viewers to get a better sense of space and layout, which are critical factors to buyers assessing layouts and potential room sizes. The warmth of the light is not just pleasant; it’s emotionally evocative. Warmer colors are associated with positivity and well-being, which can have a profound effect on how a property is perceived. It subconsciously creates a welcoming and comfortable emotion for an observer looking at photos. This emotional connection can be far more powerful than the factual details of a property listing. Ultimately, utilizing the golden hour effectively means leveraging the power of natural, soft, and warm light to present homes in their most attractive way.
Planning Your Golden Hour Shoot
Successfully harnessing the golden hour requires careful planning. Since it’s a finite window, precision is key. You need to accurately determine the sunrise and sunset times for your location. These times vary throughout the year and based on geographic location. There are many helpful apps and websites that can provide precise sunrise and sunset times. Moreover, consider the property’s orientation. For a building facing east, the morning golden hour might be ideal for capturing the front facade bathed in warm light. Conversely, a west-facing home will benefit greatly from the evening golden hour.
It’s also crucial to prepare for your shoot well in advance. This might involve scouting the location the day before, identifying potential angles, and making notes of the best areas to highlight. Discuss with the homeowner any specific features to showcase or any areas that might benefit most from the golden light. This way, you can optimize the relatively short golden hour window. Prepare your equipment well in advance. Have your camera, various lenses that best suit interiors and exteriors, tripod, and any other necessary gear ready to go so you don’t waste precious time fumbling. It’s also wise to have a backup plan in case the weather doesn’t cooperate. An overcast sky can produce a soft, even light of its own kind, but you might need to adjust your approach. In order, to best take advantage of the golden hour, a well organized photographer will create a precise schedule, and not waste time during the day and therefore maximizes the potential of light during the golden hour. This forethought allows for smooth and productive golden hour photoshoots.
Equipment and Settings for Golden Hour
The right equipment and settings can make all the difference in how well you capture the delicate light of the golden hour. While your camera will play a vital role, it is not the only part. The right lens will change how you see a space. Lens choices will dictate your view, for example wide-angle lenses for real estate to capture interiors, or telephoto lenses to isolate details. A tripod is absolutely necessary. Its use during golden hour shooting allows for stability, which becomes important as the light lowers and shutter speeds reduce. A sturdy tripod also facilitates bracketing shots for HDR (high dynamic range) photography, which balances the bright light from windows and dimmer interiors.
Camera settings such as aperture, ISO, and shutter speed should always be adjusted based on the specific scene, yet there are guiding principles for golden hour shooting. Generally, you’ll want to keep the ISO as low as possible to minimize digital noise and maximize image clarity. Aperture settings will depend on what you want to achieve. A wider aperture, around f/2.8 to f/5.6, can be useful for creating a shallow depth of field in some interior shots and focus on certain features while a narrower aperture, around f/8 to f/11, is ideal for capturing a wide, sharply focused area for expansive exterior shots. Shutter speeds will vary depending on light levels and your aperture choice. However, with the use of a tripod, you can use slower shutter speeds to capture more light while preventing blur. Finally, white balance is important, because golden hour light has a naturally warmer hue. Setting the appropriate white balance ensures that the colours in your images will be captured accurately. This can be a daylight setting or a custom setting based on the conditions. Post-processing is also an important step in golden hour photography. Fine adjustments in exposure, contrast, and color are crucial for producing that polished, inviting look that is key to professional real estate photography.
Optimizing for Exterior Shots During Golden Hour
Exterior shots during the golden hour transform even the most modest home into a property worth noticing. The soft, diffused light brings out the textures of roofs, siding, and landscaping, and it adds a level of depth and drama that is impossible during the day. Instead of harsh glare and dark shadows, you get warm tones and a pleasant overall look that can entice potential buyers. The golden hour does not just make the property look good, it allows for you to make the whole scene look great by optimizing the surrounding foliage, sky, and other outside features of the photo.
Capturing Curb Appeal
The first impression of a property is often made from its curb appeal, so exterior shots during the golden hour are key to making the best first impression. The warm light will significantly enhance the look of landscaping. It will bring out the vivid greens of the grass, shrubs, and flowers and create a sense of lushness and vitality. These are especially important in the areas where these features are a significant selling point. Low angles, a technique that is useful to photographers, are particularly effective during the golden hour. Shooting at a low angle can make the home feel more impressive and imposing. The angle can make any home look grand. Be aware of any unwanted shadows and adjust your position and angle accordingly, and carefully observe any highlights. By observing the details and how the property is lit one can begin to maximize the look.
When utilizing golden hour light for real estate, it is also best to use the sky to bring in light as well. During the golden hour, the sky can have an excellent range of colors, which can improve the scene. If there are clouds they can enhance the scene by adding depth to the picture. The warm tones combined with blue skies is often a very appealing effect on the viewer. It gives a sense of perfection. When incorporating the sky into your golden hour photos, make sure that it is not overexposed. This balance of the property and the surroundings, together with the lighting of the golden hour, can come together to make great shots. This will ultimately capture a property’s full potential and create a stronger connection with the viewer.
Highlighting Architectural Details
Architectural details can really benefit during a golden hour shoot on the exterior of a property. The soft, angled light emphasizes textures, lines, angles, and other interesting features of the structure, which might otherwise look flat during the harsh midday light. For example, brickwork will look more defined with the shadows added by the low sun, while decorative elements like windows and door frames will be enhanced by the warm glow. This added definition showcases the character and craftsmanship of details. It will convey quality and care that buyers will notice. Instead of being lost in the shadows during harsh light, these parts of a house will be highlighted in the softer golden light.
When capturing these key architectural details make sure that all areas of focus are sharp and optimized, using proper aperture. Be aware of specific architectural details, and emphasize these parts of the property. Use different lenses to capture the essence and the detail of each element. For example, telephoto lenses can be used to focus on certain features. The golden hour can add a sense of artistic flair to the look. It can produce an image of a home that is not only informative but also compelling. This creates more emotional appeal that goes beyond simple photography, and that can be very beneficial to a photographer looking to stand out. By paying attention to the architectural details and lighting you will be able to transform the exterior of properties, into eye-catching images.
Dealing With Shadows and Reflections
Even as the light during the golden hour is soft and flattering, photographers must be aware of how shadows and reflections can affect exterior real estate photos. Understanding how these parts of the lighting work means you can use them to your advantage instead of having them detract from the look of the photo. During golden hour, shadows are longer and softer. These are elements that can add depth and dimension to photos. You must be aware of any unwanted dark shadows. These shadows can be hidden either by the position of the photographer or the angling of the shot. Be aware of all distracting shadows, and be prepared to adjust to account for them.
Reflections are also something to take into consideration. Glass windows can be a challenge during golden hour as they often reflect light, objects, and even the camera. In order to minimize those reflections and optimize the look, vary your shooting angle. If you can include those reflections strategically it can add to the photo. Instead of fighting against them, be mindful and use them to improve the photo. When photographing properties during the golden hour, photographers must be aware of how the light falls upon it and plan their photos so that they are optimized, and utilize every element. Whether it’s dealing with shadows or reflections it is wise to make these elements part of the picture, instead of letting them detract from the photo.
Indoor Spaces and the Golden Hour Light
The Best Time of Day for Real Estate Photography
Real estate photos are not only exterior photos, but also include interior photos, and here, the golden hour’s magic shines just as much as on the exterior. The soft, warm light streaming through the windows during the golden hour can convert indoor spaces, and give an inviting atmosphere. This is especially useful, as most homes have a greater amount of time indoors, and therefore benefit from these golden effects. It’s not just about lighting either, the warm light enhances the look of furniture, textures, and colors, making everything look more attractive.
Capturing the Ambiance of Interior Spaces
Interior photos during the golden hour can create a certain ambiance for the viewers. Unlike overhead light, which is often harsh, golden hour light casts a soft glow that brings a unique warmth to every aspect of a room. The light from the windows spills into the room gently and allows for an even light even further away from the source. This light does not create harsh shadows and avoids the stark contrasts that often look jarring to viewers. In its place, the softer golden light will enhance the textures of wood, fabric, and other surfaces to give a rich look that flat light cannot produce. The color of the room benefits also. Yellow and red tones are more present during the golden hour and can enhance the warmth of the space. These can really give viewers a sense of the home, and its welcoming nature.
The direction of the light can also impact interior spaces. The low angle of the sun during the golden hour produces long shadows. This can add dimension and visual interest. When these shadows are properly used they enhance the perception of depth in a room. The viewer does not see a flat two-dimensional picture, but a three-dimensional image, which is much more realistic. This can help viewers understand the layout better. These subtle details can dramatically improve how a property is shown and impact how it is seen by the viewer. These images highlight the property’s visual appeal and the true potential of a home when lightened properly. When these elements come together it will create a stronger impression. The light highlights the space and creates an inviting and memorable look.
Balancing Interior and Exterior Light
One of the significant challenges in interior real estate photography is balancing the light from the exterior—the bright light coming through windows—with the typically dimmer light within an interior space. The differences in light create harsh contrasts that can make images look unbalanced. However, golden hour offers a solution. The relatively soft outdoor light during the golden hours reduces the overall dynamic range compared to the harsher light during the middle of the day. This means that the difference in light intensity between the bright outdoors and dimmer indoors is less significant, making the image easier to capture and balance. Even with this advantage, it still takes planning and technique. HDR photography can capture a larger range of light and dark. By taking multiple images at different exposure levels and combining them in post-processing, images can be created that reflect the lighting very well.
To balance indoor and outdoor light, use the camera settings to their advantage such as aperture and ISO and be sure to shoot at the lowest ISO possible for maximum image quality. Diffuse the light by making sure that there aren’t too many direct sun rays from entering, using curtains and blinds to soften the light coming in the room. In cases where these lights are being blocked, an alternative, can be supplemental lighting. Using flashes or reflectors can fill the rooms with more light, and help to even exposure of interior spaces. When combined with the soft light of the golden hour, these can create balanced and beautiful images that capture the essence of a particular space. By carefully planning and using different techniques, it is possible to create a balanced and aesthetically pleasing images that highlight different aspects of the property.
Showcasing Room Features with Golden Light
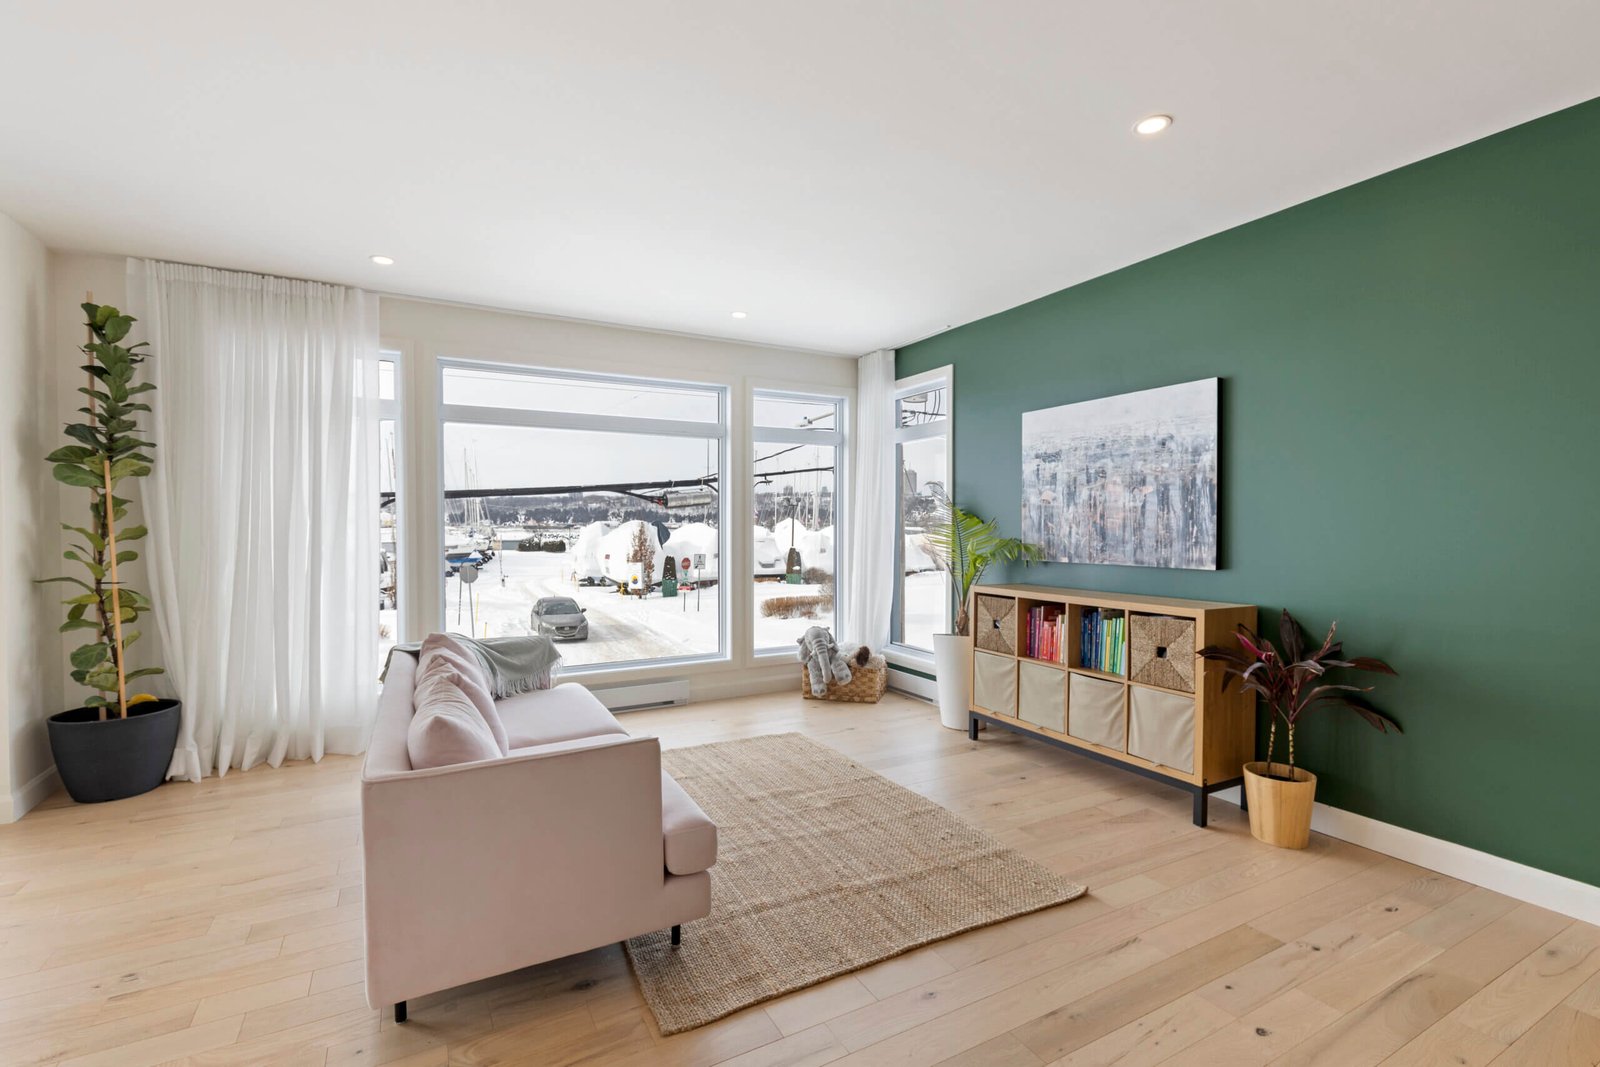
Every room in a real estate listing has unique features that should be showcased, and golden hour light is an ideal tool. Whether it’s a large living room with a fireplace or a cozy dining room with an eye-catching light fixture, the warm and soft light of the golden hour can enhance the best aspects of the space. In order to make sure the features are highlighted, understand which specific things they want to show in the room. Once this has been done, you can then use the correct lenses, and lighting to capture the room at its best angle. Instead of using direct lighting, opt for a wider shot to capture the ambience of the rooms. Golden hour will add warmth and welcoming aspects to any room in the house.
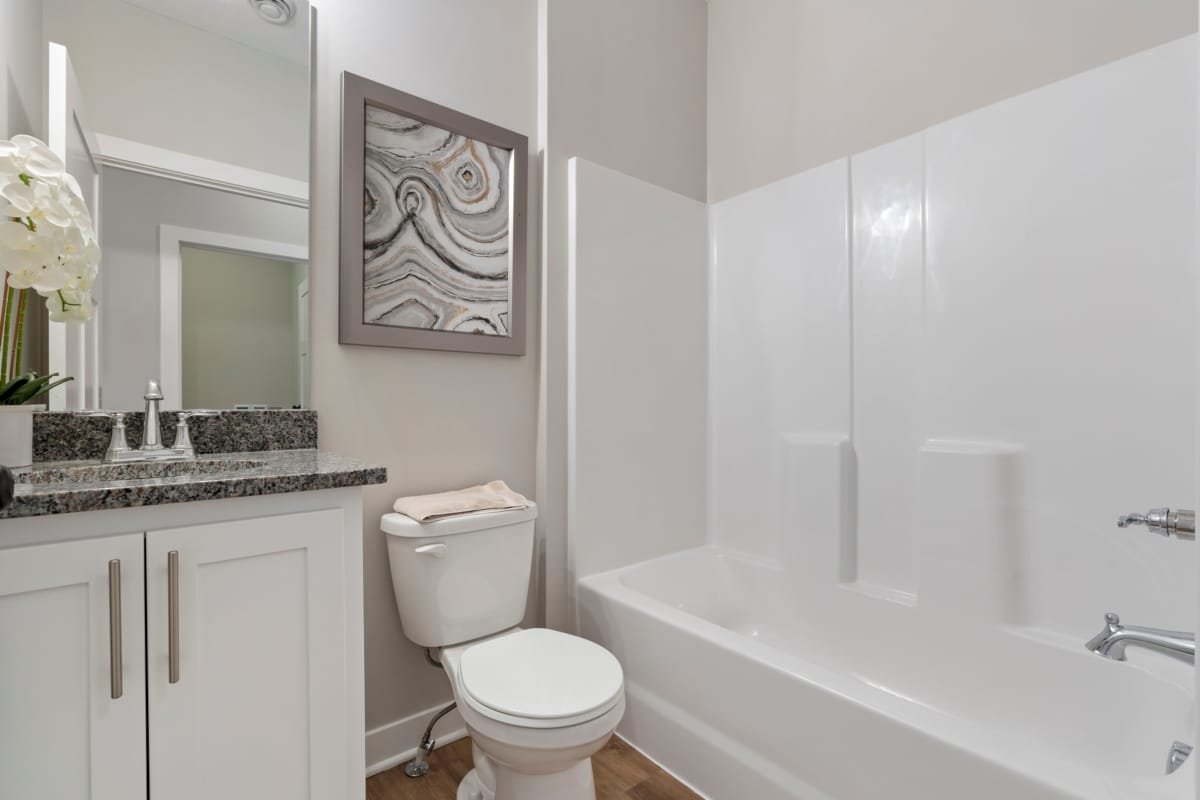
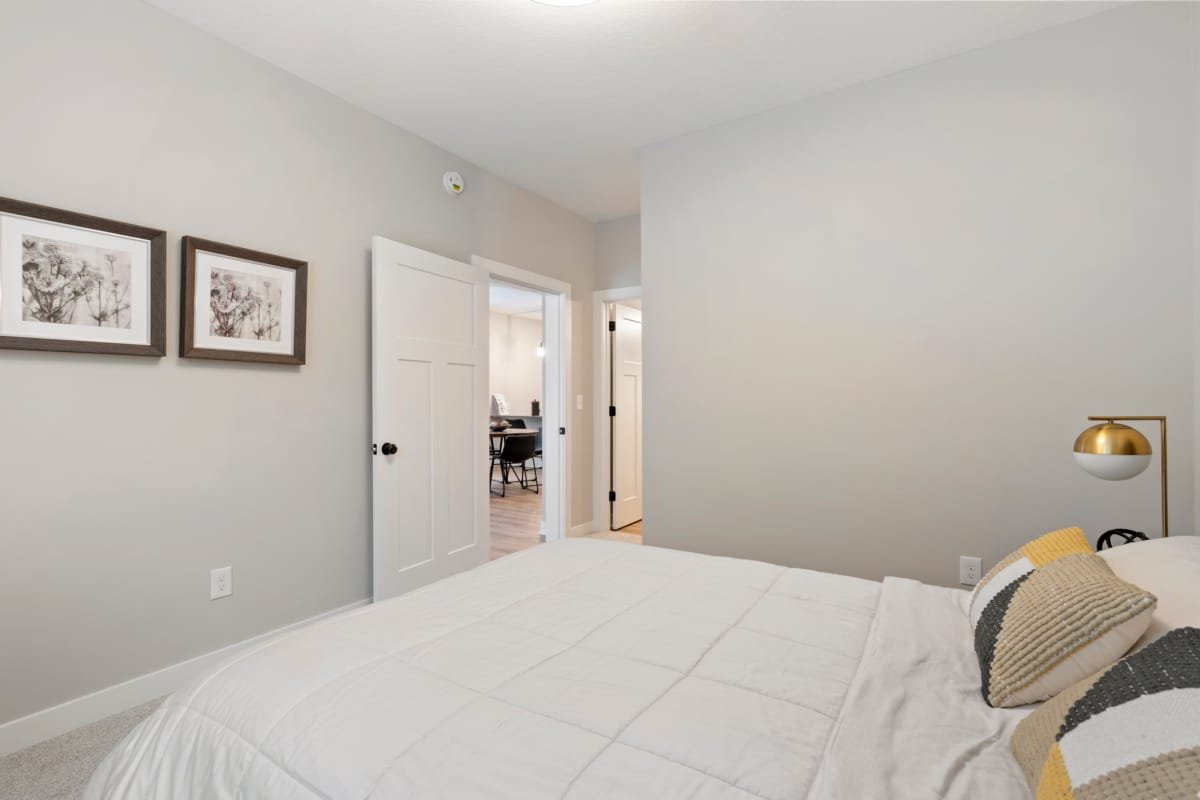
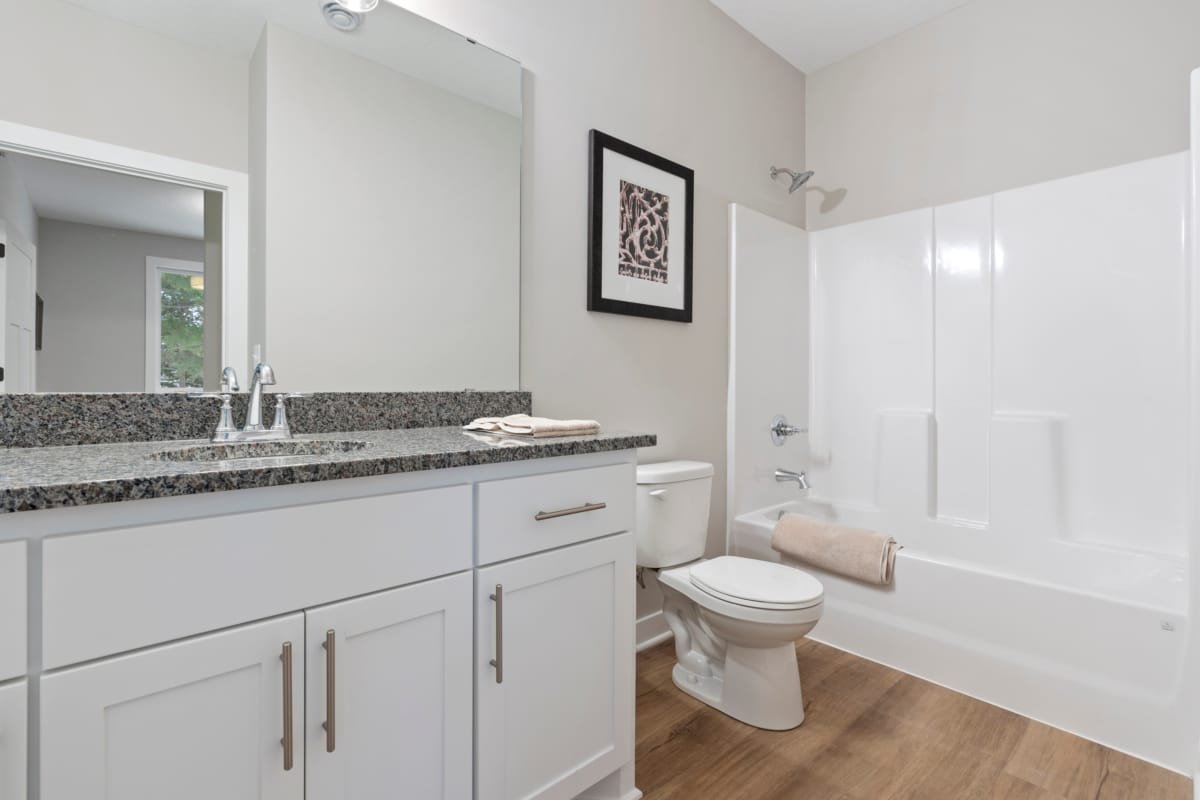
In kitchens, the golden hour can highlight the stainless steel appliances and cabinetry. The counters and flooring. In bedrooms, the soft light can be used to capture the coziness of the space, including textiles like blankets and pillows. These can add a unique visual and give a sense of what it feels like to be in that room. Bathrooms, often hard to photograph due to the high use of mirrors and sharp lights, can be transformed with golden hour light which diffuses the light, so that the space looks more relaxed with a more natural light which allows for less shadows. When photographing living spaces pay attention to detail, and make sure that clutter is removed. The goal is to enhance the ambiance of the room without distraction. The key is to work in partnership with what is naturally occurring to bring the best out of the shot and optimize everything for the best look. By carefully choosing the time of day and paying attention to those details, interior spaces can be transformed and made visually appealing.
Post-Processing for Golden Hour Real Estate Photos
While capturing the right images during the golden hour is important, post-processing is an equally essential step in creating professional-looking real estate photos. Post production helps to enhance the images, and allows for you to balance and finalize the images you have created. Post production is the key to making your golden hour images truly stand out. It’s not just about improving the images; it’s also about making sure that the images can best resonate with a specific target audience.
Adjusting Exposure and White Balance
One of the first steps in post-processing golden hour images is adjusting the exposure and white balance. Even with the best settings, images might require slight modifications to ensure they are perfectly balanced. Golden hour can sometimes result in overly warm-toned shots. Therefore it’s wise to make these adjustments using the post-production software. Start with exposure, and fine tune them so that highlights are not too bright, and shadows are not too dark. The goal is a balanced image where every section of the image is visible. The white balance is what controls how colors are depicted in a photograph. Usually the colors of golden hour are warm, but occasionally it can appear too yellow or orange. Using the ‘white balance’ tool to select a neutral color and adjust the slide can lead to more natural skin tones, and colors. These colors allow for a well balanced palette that looks more genuine.
Using adjustments in exposure and white balance are essential to balancing images and creating accurate color balances in a picture. With proper attention to detail the image will look very professional, inviting, and representative of the property. Color adjustments can be a powerful tool in post-production, but it is wise to make sure that it does not become too artificial looking. Subtlety is the key. Subtle adjustments ensure that the natural beauty of the property shines through. With attention to post-production it also gives you an opportunity to further enhance your work.
Contrast, Clarity, and Sharpness
After the initial white balance and exposure adjustments are made, contrast, clarity, and sharpness are key for optimizing the images. Adjusting the contrast levels can add a dynamic pop to images by making lighter areas appear lighter and darker areas appear darker. This can add dimension to real estate photos, but it is important to be careful and avoid creating harsh contrasts that can detract from the image. Clarity adjustments can enhance the local contrast in an image, and give them more defined textures and details. This tool is very useful for highlighting important features of a property such as the texture of the wood, or the fabric. However, it must be used in moderation as overusing it can result in unnatural looking images.
Adjusting the sharpness of a photo helps to define fine details, and make the image overall look more crisp. However, over sharpening can lead to artifacts or a synthetic look. By strategically choosing parts of the images to sharpen, like architectural details or landscaping, it draws attention to key features and improves the overall look of a property. Using these tools judiciously will create photos that are balanced, visually appealing, and representative of the property. Each element can make certain aspects of the photo stand out, and these elements can make your photos more professional and appealing. Ultimately the goal is to enhance what is already there without making it so edited that the picture no longer looks genuine.
Retouching and Removing Distractions
When post-processing real estate photos, removing distractions through retouching is one of the most important steps that helps to remove minor imperfections and clean up the image. It helps make sure that viewers will not get distracted from the features that are being shown within the picture. This retouching process can vary depending on the image. It can mean removing an object from the image or cleaning the exterior. Be sure to use a cloning tool or healing brush so that it blends into the image. Things such as trash or cars on the property should always be photoshopped out. Moreover, attention should be given to small details such as cracks in the wall or imperfections in the carpet. Make sure it looks like a home people would want to purchase.
There should be no distracting elements and any small imperfections should be corrected in order to ensure the photo looks the best and that the image is as professional-looking as possible. It’s important to be aware that the goal isn’t to make a property appear different than it is. Be ethical when editing, and always consider what people need to know within real estate photography. Make small changes, and avoid making changes to the property that is being photographed. By using retouching ethically, the property’s positive features will really stand out, which is really the aim of real estate photography.
Leveraging Cloudy Days for Real Estate Photography
The Best Time of Day for Real Estate Photography
While the golden hour is ideal for many occasions, it is also important to understand what to do when the weather isn’t very ideal. Cloudy days, though often avoided in photography, can surprisingly be beneficial. The diffused light of a cloudy day can offer a unique and advantageous set of conditions for real estate photography. These grey skies might mean that a shoot cannot happen during golden hour, but a photographers best skill is to adapt and leverage whatever they are given.
Soft, Even Lighting on Overcast Days
The primary advantage of cloudy days for real estate photography is the soft, even lighting that they provide. Unlike direct sunlight, which can create harsh shadows and overexposed areas, overcast skies act like a massive diffuser, scattering light in all directions and eliminating sharp contrasts. This results in a very balanced light that evenly illuminates all parts of the image, making it easier to capture details in both the highlight and shadow areas. This is very helpful for interior shots, especially those that include windows which tend to struggle with harsh highlights when the sun is too direct. The soft lighting allows for better detail and reduces the chance of harsh lighting from outside windows, and better overall balance to the photo.
Cloudy skies are especially useful when photographing areas of the home which tend to have strong light. A kitchen with many windows can easily be overexposed if golden hour hits the kitchen directly. A cloudy day reduces this issue, and allows for consistent light throughout a particular room. This makes editing much easier as the range of highlights and shadows is not very large. This soft, even light works very well for architectural details. As the light is not as harsh and there is less contrast, the subtle textures and details are enhanced. This form of lighting can also reduce the challenge of reflections in windows, and make them easier to photograph. Ultimately one needs to adapt to each day in the life of a photographer because each will have a new set of challenges and opportunities. Overcast days, while they are not ideal for the golden hour, still have their own important use and benefits.
Capturing Details in Shadows
On sunny days, deep shadows can hide details making them often hard to see or photograph well. This is an area that can also be improved by photography on a cloudy day. The diffused lighting on a cloudy day minimizes shadows and keeps the image in view. Details that are obscured in shadows can be seen more easily and sharply. It’s important because a potential buyer could want to examine the details of a room or exterior. During golden hour, shadows can be long and soft, and this can be visually appealing, but they can still conceal some of the important nuances of a space. So, cloudy days fill in these shadows and display them clearly.
For example, an outdoor patio with a wooden deck can show its texture in detail. Similarly, the small corners of interiors no longer have dark shadows and can now be seen with clarity. The ability to capture details in shadow areas is really important to show what is valuable in the properties. It can also prevent the viewer from thinking they are being tricked or kept in the dark by a photographer. These details can ensure that the home looks better and gives a sense of transparency with the potential buyer. These details go a long way in establishing trust and reliability, which makes for more effective marketing in real estate photography.
Editing for Cloudy Day Photos
While the initial light of a cloudy day is favorable to photographing homes, post-processing is still key to optimizing the look of the images. Because of the consistent lighting, the edits that must be made are less complex than if photographed in other lighting. The most important adjustment is often the white balance. The color can be flat on cloudy days, so using warmer white balances might bring up the color of the image. Use color correction tools to add saturation and warmth to make the image appear more welcoming. Additionally, contrast can be adjusted for more visual interest, but always make sure not to overdo it.
Clarity can be added in post editing, as well as sharpness so that features are more prominent. Distractions can also be removed, much in the same way that is needed on sunny day photos. In cases where the sky is a very grey, it can also be swapped with an optimized sky. The goal should always be to create an image that is detailed, inviting and realistic, and it’s up to photographer to make sure that no matter what the weather the work that is being produced is at the highest caliber. By editing cloudy day images to be more appealing photographers can leverage all types of weather and create professional looking images.
Conclusion
The golden hour is undeniably a cherished time for real estate photography, and offers soft, warm light that dramatically enhances the appearance of properties. However, a great photographer can use all types of time and weather conditions to make the most of a photo session. Whether it’s golden hour, cloudy skies, or other conditions, a professional photographer needs to use the right tools and techniques to capture the property at its very best. The key to great real estate photography is to always be willing to adapt and learn. The art of a true photographer is never to be limited, and to always find ways to improve. By understanding, planning, photographing, and editing images you can truly capture the charm and potential of any home.
Contact me for the best real estate photo editing service.


