

Mastering Real Estate Photography: Tips for Shooting Both Interiors and Exteriors
Real Estate Photography is an essential skill for anyone involved in the property market. From realtors to landlords, the ability to capture compelling images of properties can be the key to attracting potential buyers or tenants. This skill goes beyond just snapping a few photos; it involves understanding light, composition, and the nuances of showcasing a property’s best features. This article will delve into the intricacies of achieving professional-quality real estate photographs, both inside and out, guiding you step-by-step through the process.
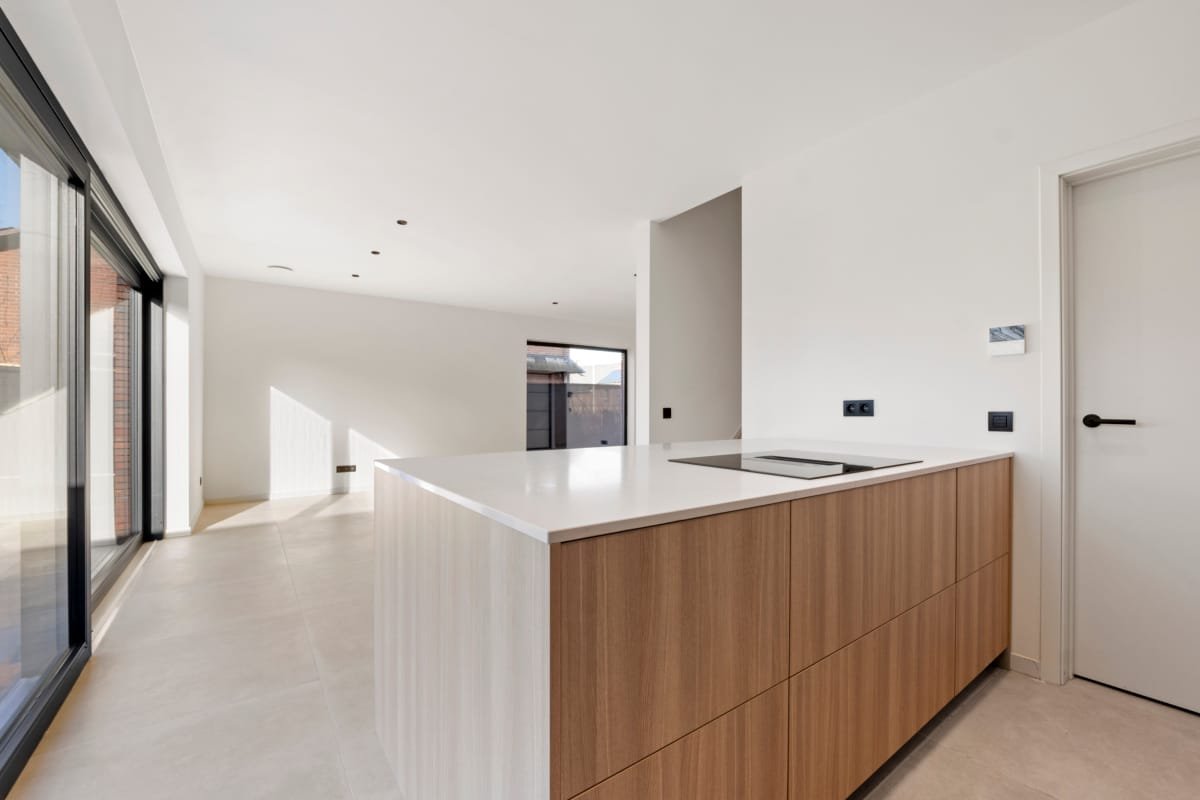
Understanding the Art of Interior Real Estate Photography
Real Estate Photography
Interior photography presents a unique set of challenges. Unlike exterior shots, where natural light often takes center stage, interior spaces demand a careful manipulation of both natural and artificial light, angle, and composition to create an inviting and accurate portrayal of the space. It’s not merely about capturing a room but conveying its feeling, functionality, and potential. It’s about showcasing the lifestyle that a space offers, not just documenting its existence.
Harnessing Natural Light and Supplemental Illumination
Natural light is your best friend in real estate photography, but it is not always enough. The goal is not just bright, but balanced light. Overly bright windows can be as damaging to an image as dimly lit corners. Learn to recognize the qualities of different types of light, and their various intensity. Morning’s soft light may be perfect for bedrooms, while mid-day harshness will need to be diffused for kitchens with east facing windows. Understanding and addressing different lighting conditions is key to producing professional-level work. In situations where natural light is insufficient, a photographer needs to utilize supplemental and artificial light to bring out the best of the interiors. This could include using softbox lights, diffusers, and reflectors. In fact, a strategic use of artificial light will fill shadows and enhance the texture of surfaces, adding depth and dimension to images. Mastering blending techniques is also essential. Shooting between 5-7 exposure brackets, then blending these frames in a software such as Photoshop can render a space more like how it appears to the human eye—with both the brighter windows and the darker corner areas both adequately exposed.
The key here is subtlety. The goal is not to make it obvious that you’ve used supplemental lighting, but rather to create an overall sense of even and inviting illumination. This balanced lighting will not only make the space seem brighter but will also help to highlight its best features. Pay particular attention to details and textures within a room, which can often be lost in poorly lit environments. The play of light on a textured wall, the gleam of a polished countertop, or the warmth of a hardwood floor all contribute to the overall feel of a space and these should be captured for full effect. You’re not just lighting a room, you’re lighting the mood and the experience of being in that room.
Furthermore, think about the color temperature of your artificial lights. Mixing warm and cool lighting can create a jarring effect. The aim is to keep the tones consistent with the natural light present to create a cohesive overall style. Finally, don’t underestimate the power of shadows. Though it’s important to avoid excessively dark areas, a carefully placed shadow can add depth and dimension to an image, giving it a sense of three-dimensionality and making the space feel more real and tangible.
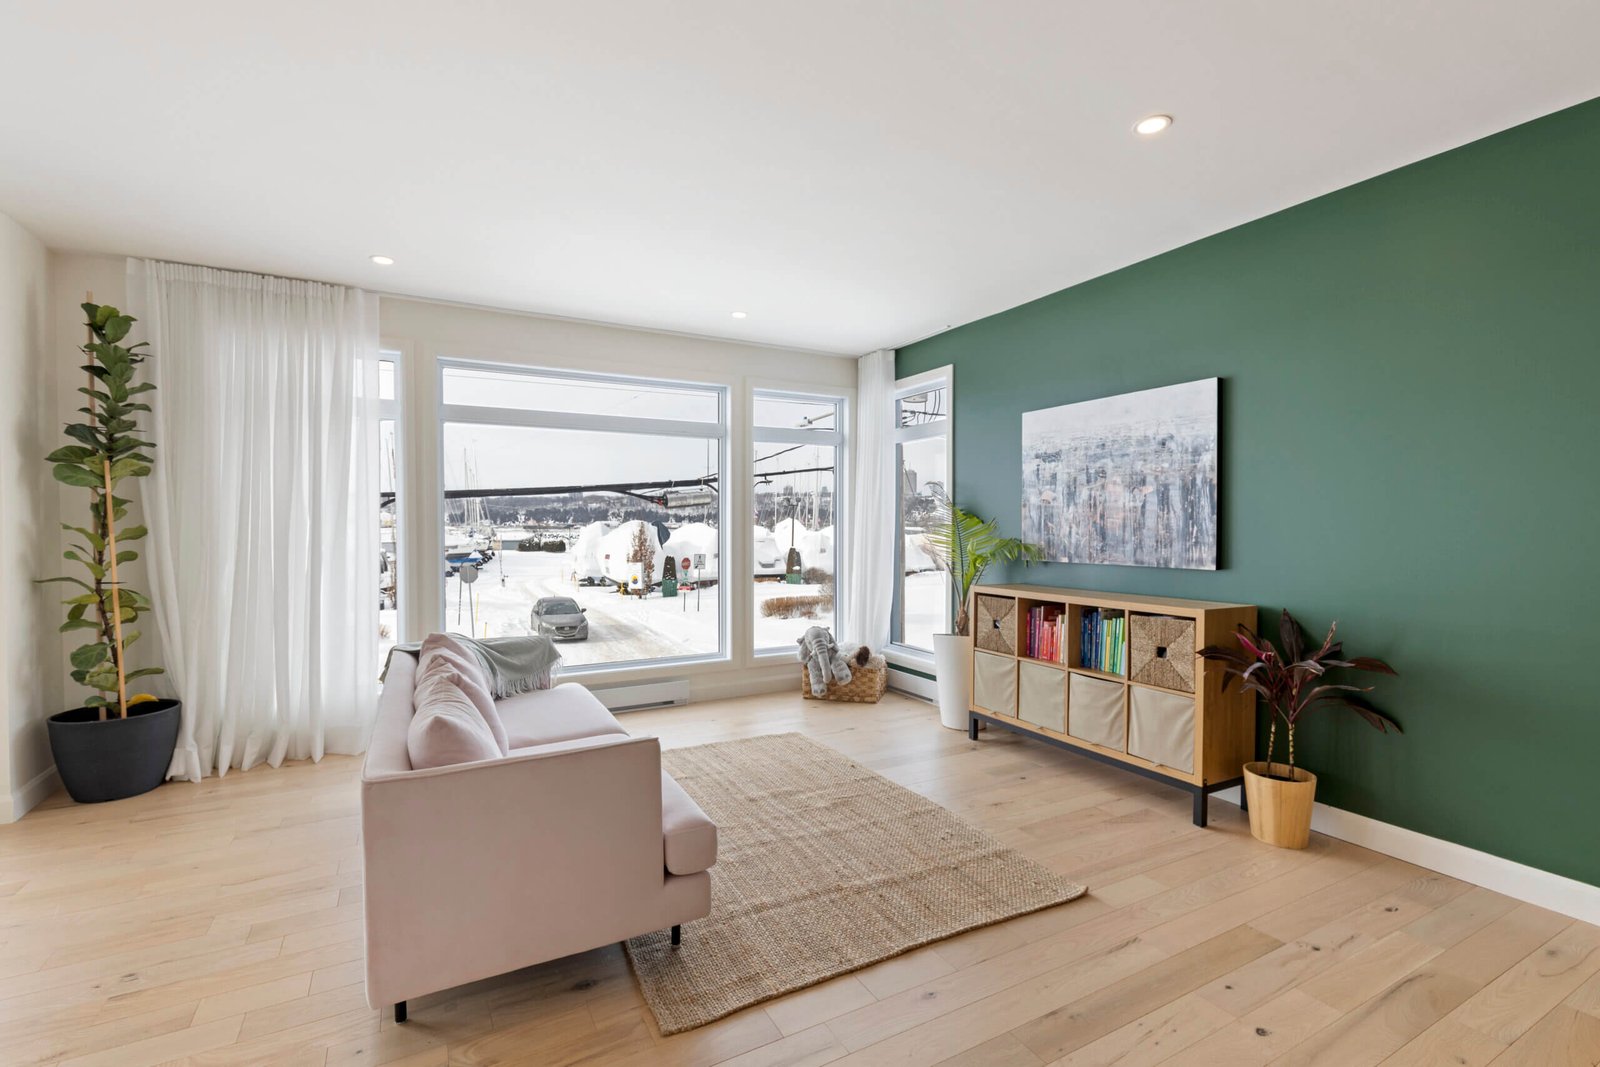
Strategic Composition and Framing Techniques
Composition goes beyond simply pointing the camera and snapping a picture. It’s about arranging the elements within the frame in a way that draws the viewer’s eye and showcases the space effectively. Every line, form, and visual element can be a way to lead the eye, showcasing focal points or flow through the various rooms. The standard for real estate images is to keep lines on a more horizontal or vertical axis, with as little tilt as possible. This will create space that feel more professional or well put together. This level of attention to detail can make or break a photo’s appeal.
One of the most important composition techniques in real estate photography is using a wide-angle lens. Wide-angle lenses allow you to capture more of the room in a single frame and often feel larger than the space feels in actuality, but it needs to be used carefully. Too much wide-angle can distort straight lines or produce a fish-eye effect. The goal is to use the wide angle to maximize the visual size while avoiding this type of distortion. In terms of placement, try to center elements wherever possible, while keeping the edges aligned with the frame. This creates a balanced and harmonious feel. Avoid overly busy foregrounds or backgrounds that can distract the viewer, and try to find ways to include views to the outside. Including views connects the inside and outside spaces, and also allows the space to feel more open and connected to its surroundings.

Think of the eye-level view. While it is helpful to have a variety of shots, it’s often ideal to capture images at a height similar to how you would view the room yourself—not too high, and not too low. This perspective makes the viewer feel like they can step into the room. Moreover, consider the rule of thirds when composing a shot. Imagine dividing your frame into nine equal sections, and position the focal points along those lines or at their intersections. Try to showcase a flow through of different connected spaces, where possible. For example, from the living room into the kitchen, showcasing how the property feels. The use of these types of angles help a potential buyer visualize themselves in the spaces more fully.
Showcasing Functionality and Features
Real estate photography is not just about taking pretty pictures. It’s about highlighting the functional aspects of a space. Every feature should be presented in a way that is both aesthetically pleasing and practically relevant. If there is a fireplace, ensure the mantel is present and items are strategically placed to highlight this feature. Similarly, if the kitchen has stainless steel appliances or granite countertops, make sure that the lighting and composition showcase that. These types of features, if visible within a photo, will help make the property seem more desirable.
When highlighting functional spaces, like kitchens and bathrooms, pay close attention to the layout and flow. A well-composed image should provide a clear understanding of how the space is used. For example, in a bathroom, make sure that the shower, toilet, and sink can all be seen in a way that shows how the space interacts and connects visually. Highlight the storage potential as well. If there are built-in cabinets, shelves or closets, make sure to showcase how these spaces function, and how they are set up. The more information you can convey through images, the better—which will allow for fewer questions and encourage more calls for showings. Moreover, it’s important to be consistent in style throughout the space. Use the same lighting techniques, angles and approach across all areas, creating a cohesive overall collection that shows a coherent message.
When photographing details, like doorknobs, faucet fixtures or light switches, make sure that the surrounding space is also appealing. If the detail shot is too close, it may not be clear where the item is. Give the feature context, showing how it interacts with the larger space by including enough of the surrounding space it resides in. Make sure to capture all unique or bespoke features in your photos. This could be anything from built-in shelving to custom molding or unique tiling. These kinds of details can be critical for appealing to specific buyers and also add visual interest to your photos. The goal is to make each feature stand out by making it more desirable, enticing and appealing through strong photography.
Exterior Real Estate Photography: Capturing Curb Appeal
Exterior photography is the first opportunity potential buyers have to connect with a property. It’s often the first thing they see online or in brochures. Therefore, it’s paramount to ensure the outside of the property looks its very best. The curb appeal can make or break a buyer’s interest in even considering going inside and seeing more! The aim is to create images that inspire curiosity and a desire to learn more of what is on offer. This involves using the right lighting, composition techniques and showcasing the property’s unique attributes.
The Golden Hour and Lighting Considerations
The quality of light is one of the most important factors in any photography, but it is especially so when shooting exteriors. The ‘golden hour’ and ‘blue hour’ are essential for real estate shoots. Aim to use these periods whenever possible. Golden hour, in the early morning and late evening, provides a warm, soft light that creates depth and dimension. This is preferable to the harsh shadows and washed-out look that often come with mid-day sunlight. These soft, warm tones can add an element of luxury and beauty to exteriors that might otherwise appear bland in harsher light. However, keep in mind that the angle of the sun changes throughout the day, and where the sun is located will cause a completely different look and feel. Use tools such as sun tracking apps, and consider how the angle and direction will affect final product.
When working with natural light, use the same basic principles that you would when capturing interior spaces. The goal is an even, well illuminated picture that avoids overly dark or overly lit areas. Consider the direction of the light, and try to avoid harsh shadows that can distract from the overall appeal of the property. In many exterior situations, it’s helpful to have multiple frames exposed for the highlights, mid-tones and the shadows, then to combine them together in your editing software, so that detail can be reclaimed across the entire dynamic range. Also, consider taking different shots from different times of the day. That way, if images from one time don’t work well, there are options on hand. If the home has decorative lighting or landscaping light that comes on at dusk, capture these as well. It’s beneficial to show how a space looks during different times of day, showing both the daytime and nighttime appeal.
If the conditions are not ideal for natural light photography, a good lighting set up can make a world of difference. Flash photography can be used to help even out harsh shadows. Another technique can be the use of an off-camera flash, which is when a light system is used to create soft, even lighting. The use of a drone can also help to mitigate the impact of poor lighting conditions. Drones capture images from a wide variety of angles. If the setting or angles that are most flattering are ones where the lighting is not ideal, consider using a drone. The wide varieties of framing can make less than ideal settings appear ideal.
Angles, Perspectives, and Property Framing
Capturing an appealing angle can transform exteriors. When first showing up to an exterior shoot, consider walking around the property, observing how the space looks from many different angles. What are the best angles that highlight the property’s appeal? A good place to start is to position the property in the center of the frame, head-on, showing the full facade. This establishes a clear and direct view of the home. From there, consider other angles. Consider capturing corner views. This shows the depth of the property, and also can help with perspective and framing. These types of slightly angled shots of the property allow for showcasing two sides of the property, which gives viewers an easier way to conceptualize the footprint and overall appeal.
Pay particular attention to the lines of the building. Use the verticals and the horizontals of the property to frame the shot. Avoid tilted images, allowing the eye to easily take in all that is present. Furthermore, when considering the overall shots, be sure not to take too tight of a frame, and showcase the surrounding landscape. Include elements like gardens, walkways, driveways and fences. These shots give a broader sense of perspective and offer a better understanding of the property’s surroundings. Keep the overall framing in the shot very organized and clear with a distinct focal point. Avoid anything that can come up as visually distracting or that may take away from main points of interest.
When framing, keep the overall flow of the shot in mind. Try to lead the viewer eye into the property. Use walkways, driveways, or landscaping to create flow lines. This method can add depth and draw in the viewer. Make sure not to cut off parts of the property off in the main shot, but rather, to show the full potential and footprint of the property. Showcase any unique exterior features, such as water features, balconies, patios or porches. These elements give viewers a better idea of the kinds of areas they have to enjoy on the property.
Showcasing Landscaping and Unique Features
The real magic of a property is not just the building itself. Instead, the property’s surroundings bring it all together. Landscaping, trees, gardens, patios, fences, driveways and walkways can all add to both to the property’s value and curb appeal and should all be included in exterior shots. This includes landscaping that is well maintained and vibrant. Be mindful of season you capture an exterior. In the spring everything will look fresh and new. In the fall, colors will provide warmth and depth. Showcase all seasonal looks, and try to use these to your advantage to highlight the inherent beauty that is already there.
Highlight unique landscaping features. If there are beautiful flowerbeds, well-maintained hedges or unique decorative elements, be sure to place a focus on them in your photography. Capture unique details, such as exterior lighting fixtures, mailboxes and door hardware, especially if they are are vintage or of unique design. Just like the interiors, it’s important to showcase the details that make the property stand out as something unique beyond the average property. In addition to the features, be sure that all images have a clear subject or focal point. Avoid overly chaotic shots where the viewers’ eyes jump from place to place, and ensure each shot is well organized, thoughtful and clean. The shot should tell a story about a property’s overall style and appeal.
Consider including the surrounding neighborhood, as well. Where possible, show the nearby areas and how they interact with the property. If there are parks, schools, stores or nearby transit, show these features, so that potential buyers get a bigger sense of how the space interacts with the surrounding areas. Overall, show the life that a potential buyer could have within and around the property if they were to live there. All of these elements can help paint a picture of the properties potential and help the viewer start to see possibilities for themselves.
Advanced Techniques for Real Estate Photography

Real Estate Photography
Beyond the basics, some more technical approaches can significantly elevate the quality of your real estate photography. While having an understanding of the fundamentals will assist you in your work, diving into advanced techniques will push your work to the next level. These techniques can be challenging, but with the right set of tools and a solid understanding of how they work, they will help you create a more sophisticated portfolio. These skills will set your work apart and create opportunities to showcase a greater range of ability. These skills will also assist in showcasing your value as a professional to future clients.
HDR (High Dynamic Range) Photography and Image Blending
HDR photography and image blending are techniques that are used to deal with the dynamic range that both interior and exterior shots can present. Standard cameras or equipment cannot always capture the full range between the bright and dark areas in any given scene. HDR techniques are used to blend several photos to create images in which both the highlights and shadows are clearly visible. These blended images are better able to capture the space how it appears to the human eye. This process often starts with shooting several images at different exposures. You will need to use a tripod and keep the camera in the same place for several shots. Each will be optimized for different lighting levels, so you can recover each of the shadows, middles and highlights within the space. Some cameras may have an HDR mode built in, where the camera itself will do this blending.
The process is often done in photo editing software. The software will align exposures and merge them into one balanced image. Blending is the next step. You will have this merged version and other singular photos that are either highlights or shadows. Depending on the areas that need the most attention, you will layer the different exposures in your photo software, giving you the most detail in your final image. This technique will really push the quality of your work by recovering dark shadows and overly bright areas, making the image more balanced. Use HDR carefully. Overprocessed images can look fake or unnatural. This step is helpful when capturing difficult lighting conditions. Don’t use HDR when it is not necessary. Many standard photos will be just fine with out this process. This technique should be used on an as needed basis, not as a go-to, for every image.
An important step within HDR technique is not only in having the ability, but have the ability to apply HDR in a way that is subtle. The goal should be to create a seamless overall integration, where the resulting photos feel like natural and appealing, yet are well detailed throughout. Practice making smooth transitions between the layers, to avoid any harsh or unnatural looking lines or changes between all the various sections. Use it as an enhancement, to help fine tune and optimize your work.
Using Drones for Aerial Views
Drones are very popular in real estate photography, specifically for their ability to allow new perspectives on properties. Drones are able to capture unique angles, both from far above a property or closer to a property, that would be impossible with standard camera set ups. The ability to capture the property from angles that were previously inaccessible makes it possible to create more visually interesting and appealing images. When using aerial photography, it’s useful to showcase how the property interacts with its surroundings, and to offer a better sense of its location.
When starting out aerial photography, be sure to familiarize yourself with the local rules and regulations related to drone use. Always keep your client’s safety as a first priority. Once you are equipped with all the proper safety info and tools, be sure to check the weather before flying. Windy or rainy day may make flying challenging or near impossible. Start with basic shots and angles. Learn how to control the drone and then slowly branch out. Keep perspective in mind when flying. Pay attention to the angle and how the different perspectives look in photos. Some angles are going to be more effective than others. Also, think about highlighting the surrounding areas. Show how nearby nature or urban landscapes interact with the property. This can help viewers understand a property’s overall location.
Furthermore, drones can capture videos, not just static photos. Consider capturing short video clips of the property, which can be used to show movement, or even to highlight features when moving through a space. This is an effective marketing approach that can take your professional offerings to the next level. Use drone photography sparingly. It can add a lot, but the angles should also be unique and add value to the overall final product. Don’t use drones because they are trendy. Instead use them because they add to the story, depth and overall appeal of the collection you are creating for your client.
Post-Processing and Editing Workflow
Post-processing is as important as the shoot itself. It is the last step of making an image look its best. Post-processing can do things like straightening lines, adjusting colors and fixing flaws in an image that were not noticed when initially shooting. Post processing not only fixes issues, it also helps to enhance and draw out all of the positive attributes of an image. To start, the first important step is cataloging everything you capture. With hundreds of photos to go through, you need an effective system for organization. Lightroom or other similar software will allow you to tag, sort and create catalogs that are easy to use and access, so that you can keep all your client work distinct with effective naming conventions.
Once the basic organizational steps are complete, it’s time to get started with editing. For each image, start with a basic clean up. Adjust contrast, highlights, shadows and make all the lines in the frame level. Then, move into color processing. Be sure to balance colors, so that all the interior and exterior shots throughout a shoot look consistent. Also, it is often helpful in this stage to clean up any excess clutter or blemishes within images. Use Photoshop’s clone or healing brush tools to address distracting features. Keep all changes in alignment with the standard practices within real estate photography. The goal is to highlight the best parts that are there, not to add or to take away from the underlying reality of a space.
Furthermore, batch editing is a great time saving technique. Once you have a set of adjustments that you want across several interior shots, you can copy these changes and apply them to many of the same images at once. This process helps ensure that the image collection has a unified overall style and look. Once adjustments are complete, export the images at both a low and high resolution, optimizing them for various types of use. The ultimate goal of the editing stage is to refine an image and help bring out all of its great qualities. With a strong workflow setup, you can create an efficient way of working that will make your post processing stages much easier.
The Business of Real Estate Photography
Real Estate Photography
Turning passion into a profession in real estate photography comes with its unique set of challenges and rewards. It requires both a deep understanding of both technical skills and entrepreneurial acumen. Building a successful real estate photography business means paying attention to all aspects of business, not solely to the photography itself. This means that a strong understanding of both the craft and the business side of the industry is key for success.
Building a Portfolio and Attracting Clients
A solid portfolio is your most valuable asset. As the primary way to showcase your creative skills, a portfolio needs to be thoughtfully curated as both a demonstration of your technical skill but also a reflection of your unique style. Creating this takes time. However, do not feel you need to wait until everything is perfect. It’s worth starting early with simple projects and slowly upgrading and refining your approach over time. The goal is to put together a collection of your best work, and use the lessons you learn on each project to develop a more refined approach moving forward. To build that portfolio, try offering free or discounted services to local real estate agents or property management firms. This will not only provide you with work to showcase but also generate useful reviews and client testimonials.
When putting together your portfolio, make sure that there is a diversity of the kinds of spaces you want to capture. Be sure to include both interior and exterior showcasing a wide variety of styles. Pay attention to all details. Be sure to showcase your use of lighting, composition, and advanced techniques. Think of your portfolio as your story as a photographer. Each photo needs to be thoughtfully placed, to show a level of intentionality and mastery of the craft. It's often helpful to start with a website or social media platform where you showcase your work. Having an online presence allows potential clients a central spot to see your work, easily share it and connect with you through your contact information. It may also be worthwhile to attend local trade shows to get noticed within the real estate market. Networking is crucial in building relationships that can eventually turn into job opportunities.
Finally, pay attention to client relationships. The way you treat clients matters. Each client is an opportunity to secure more contracts or future job prospects. Respond promptly to communications, meet deadlines, and always treat each client with the highest level of professionalism. Referrals make up for a lot of work. Happy clients often turn into repeating and refer potential clients. This will help you save on the work of marketing as well, as clients themselves end up doing more for you.
Pricing Strategies and Packaging Services
Pricing a photo shoot is one of the highest priorities within any photography business. When you’re first starting out, you might consider doing some work for free to build a portfolio or do work at cost to get experience. As you grow, you need to start pricing your services appropriately. It’s important to consider both the cost of the shoot and the time you spent, but also what your skills are actually worth in the market. Some basic options to begin with are to price per hour, or per project, which includes a set number of images. Consider adding additional options such as HDR processing, drone footage and twilight photography. These all have a cost to them. Create packages that offer specific options and value.
When establishing your pricing, consider the types of competitors that are within your local area, and what they charge. It’s important to be competitive in the market, and to set prices that make sense within the market you inhabit. Do not underprice your skills, or cut corners in order to offer the lowest rate. Instead, emphasize your value through the quality of your work. Your prices need to cover your time, the cost of equipment, and marketing related expenses. Also consider all other hidden costs, such as travel to and from job sites, editing time or any other unforeseen expense related to production. Do not set prices until you have carefully determined all the hidden expenses that you will likely encounter.
Be transparent about the pricing up front. Clear agreements and terms will avoid misunderstandings. Outline every service that is on offer, and the costs associated with each. It can be useful to offer discounts or promotions at the outset to attract clients. All in all, be sure that you will able to make a comfortable profit while providing solid services. It is good business to work only with people that are not trying to cut your prices, or that are not seeking unrealistic benefits from working with you. It’s better to have less clients, that respect your expertise, than to have more clients that expect cheap or low quality services.
Marketing Your Real Estate Photography Business
In a competitive market, effective marketing is paramount. You need to find new ways to promote your business. A great place to start is to have a strong online presence. A website is a great place to showcase high-quality images, contact information and testimonials. Use search engine optimization to improve your online visibility. Set up accounts on all of the different social media platforms, and start to connect with people in your network. Social media can be a powerful way to engage with real estates agents, builders, landlords and prospective clients. Be sure that every online presence reflects your unique personal style, brand or creative viewpoint.
Also consider using traditional marketing channels, too. These have proven to be effective over time. Direct mail campaigns, flyers, or brochures can be helpful channels for reaching clients. Consider attending real estate industry events. Set up a booth or table to gain visibility in person. You can hand out materials, and talk with people, networking in person. Another often overlooked marketing step is to offer free samples or demonstrations of your work. Offer free image samples so that real estate agents can see the work directly. Once clients secure a sample, they will begin to get a sense of the quality that you offer, which will make them more interested to work with you.
Building brand recognition is also key. Consistency between your brand and work, along with consistent marketing, will help make you a memorable commodity in the market. Finally, pay attention to word of mouth referrals. They are a great source for new business. When you form great client relations, you are more likely to get more contracts, but also free marketing through positive reviews. Focus not only on doing great photography, but also on offering a great experience for all clients. This should always be your goal.
Conclusion
Mastering real estate photography is a journey that requires dedication, practice, and a passion for capturing spaces. From understanding the nuances of lighting and composition to leveraging advanced techniques like HDR and drone photography, each step contributes to crafting compelling images that stand out in a competitive market. By continuously refining your skills, building a strong business foundation, and marketing your services effectively, you can not only succeed but excel in this dynamic and rewarding field. The key is to never stop learning, always seek inspiration, and let your passion for the craft drive you towards excellence.
Contact me for the best real estate photo editing service.


