

How to Deal with Challenging Lighting Conditions in Real Estate Photography
Real Estate Photography is a crucial element in attracting potential buyers and renters. The quality of your photographs can dramatically influence how a property is perceived, and arguably, lighting is the single most important factor in achieving stunning and appealing real estate images. However, as any seasoned photographer knows, lighting isn’t always cooperative. In this post, we will delve deep into how to overcome common lighting challenges and capture properties at their absolute best.
Understanding Natural Light in Real Estate Photography
Real Estate Photography
Natural light, often considered the gold standard in photography, can be both a blessing and a curse in real estate photography. While it can produce the most beautiful, realistic, and appealing images of a property, it’s also highly variable and unpredictable. Mastering the art of utilizing natural light effectively requires both knowledge and adaptability.
The Ideal Time for Shooting
The golden hour, the period shortly after sunrise and before sunset, is often touted as the prime time for photography. But does it always apply to real estate? The short answer is, it depends. While the golden hour provides soft, warm light that can enhance the beauty of exteriors, it might not always be suitable for interior shots where the light can be too directional or produce harsh shadows indoors. Understanding the direction of the sun and how it affects each room is crucial to planning your shoot. Consider the orientation of the building; for example, a property with large east-facing windows will benefit most from morning shoots, while those with west-facing windows will look best in the afternoon. It’s also critical to know that what is golden and beautiful one day, can be hazy and dull the next. Flexibility is key. Instead of sticking strictly to a particular hour, observe the light, and time your shoot when the property appears best. Personally, I’ve spent many mornings scouting a property before the actual shoot, making sure that I know how the light will be coming in. This allows me to be prepared and ensures that I’m not wasting precious shooting time when the light is at its peak. The ideal time isn’t just about the sun, it’s about the specific light and how it interacts with the property.
In practice, I often work with a rough timing plan for different parts of a house. For exterior shots, I am aiming for late morning or mid-afternoon to get the best lighting of the house structure and yard. I do find on many occasions, if I am shooting the inside of the house towards the evening, I will have to use artificial light to help out. I’ve found that shooting too early or too late can cast long, dark shadows on the house or cause other areas to be excessively bright due to the harsh sun (if it's a sunny day). The most important thing is to understand how the light moves throughout the day for any given place you are shooting, and use that knowledge to leverage the best lighting for each unique property. For inside the house, I usually aim to shoot rooms around midday to use as much natural light as possible when the sun is at its highest. This tends to help minimize the harsh shadows cast indoors.
Dealing with Overcast Days
Overcast days, though lacking the drama of a sunny afternoon, actually offer a unique advantage to real estate photographers. The diffused lighting reduces harsh shadows. This allows you to capture interiors with a soft, even illumination. Although some may see overcast conditions as a problem, they can make it easier to capture images with a broad dynamic range, meaning that both the brightest and darkest parts of your shot can be captured with good detail. One of the greatest benefits I’ve personally experienced with overcast conditions is how well they work with artificial lighting. When there is no bright sunlight streaming through windows or overpowering artificial lighting, it helps to create balanced room shots. However, you won’t capture the nice sunlit highlights on surfaces, that golden hour would offer. This is why it’s ideal to try to plan your shoot when it is sunny, or try to use artificial light as a substitute.
On overcast days, it’s especially important to pay attention to color balance. The lack of warm daylight can often cause your images to appear slightly cool or blue. You want to have a good understanding of your white balance function, and adjust it while shooting or in post-processing to add some warmth to the indoor images. It may be helpful to shoot your images in RAW format, as it will give you access to more information and allows you to adjust the white balance later as needed. Something I always do is to take a quick shot of something that is white in the room. This way, I can ensure that my images are appearing correctly. You also want to pay attention to the light filtering in from the windows and outside, and try to capture the outdoor scenes in a more natural color tone. The goal is to get the whole image to look as close to reality as possible. An overcast day can be turned into a gift if you can learn to use it to your advantage.
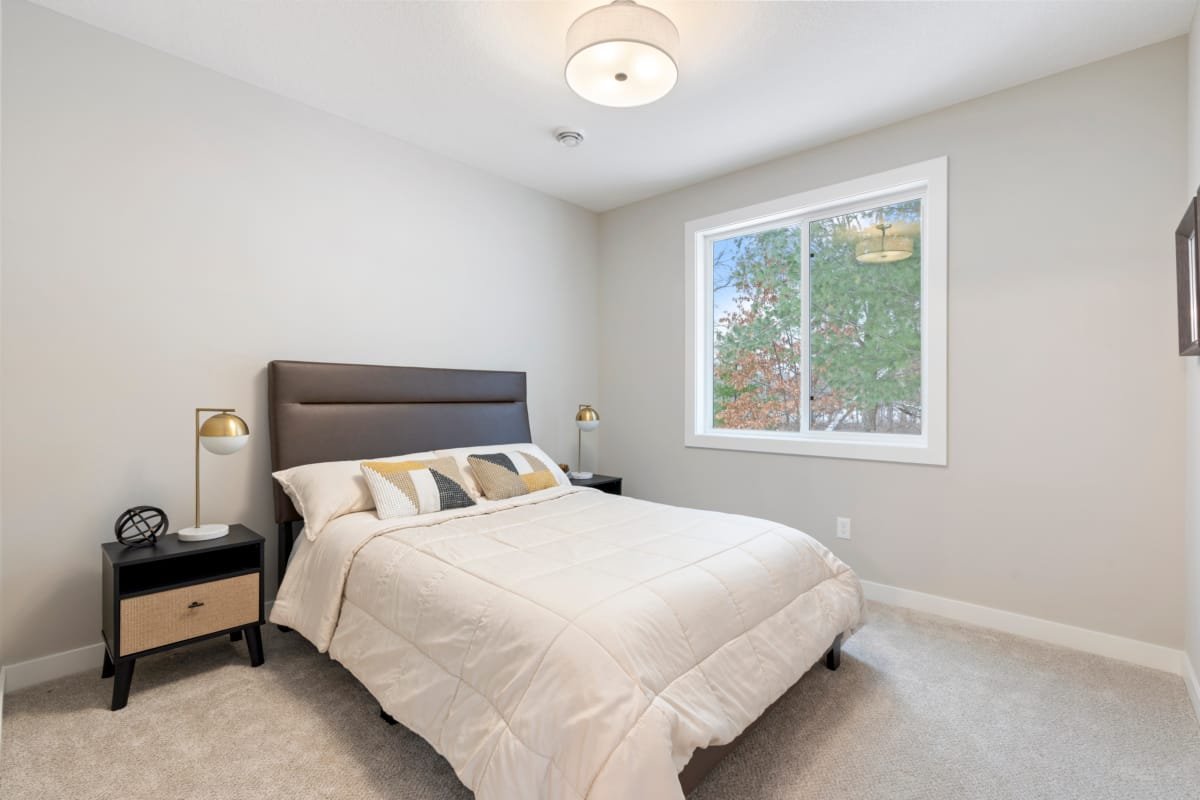
Utilizing Window Light Effectively
Windows offer a powerful source of light in interior real estate photography. However, they can also be a source of overexposure. To use window light effectively, position yourself in that angle where the light can bring out the space to its full potential. The light should be coming from behind or to the side to highlight the details. It also helps to ensure that you bring out the outdoor scene. Make sure to be aware of your aperture, or the level of your exposure, so you can avoid overexposing the outdoor scene, or the indoor space. If you have an image with both indoor and outdoor scene, you may have to take two separate pictures and combine them in post-processing. This is an advanced technique, but very helpful. What I will sometimes do it to ensure there is enough light coming in through the windows, which will help balance out the images. Try to use every creative angle you can think of to help capture the best shot.
Understanding that window light will change throughout the day is another key part of maximizing window light. Pay attention to the time of the day and how this will affect the indoor lighting, and that the natural light is not going to be the same every day. Experiment with different angles and positions with your camera to see how the light can highlight or enhance the particular features of the room. This is especially true in rooms that face north and south, where you will notice that the light is very different. What is beautiful and stunning in the morning may look completely different in the afternoon. Always try to use a light source when there is a need, especially if the scene seems dark or lacking definition. Using an external light source to help fill in any shadows will give you that professional looking photograph.
Mastering Artificial Light in Interior Spaces
While natural light is ideal, it’s often insufficient or unavailable in real estate photography, especially when you need to photograph small rooms or at specific times of the day. Artificial light becomes a critical tool in these situations. Understanding different types of lighting and ways to manipulate them is essential to creating professional looking photographs, in any environment. By understanding artificial lighting, you can transform a poorly lit and unappealing property into a place that would make anybody want to see it in person.
Understanding Different Light Sources
Artificial lighting comes in a variety of forms, each with its own characteristics that impact your photos. The first type is continuous light. This form of light uses LED (light-emitting diodes) panels,

or continuous light bulbs. They can come in a variety of shapes and sizes and are typically used due to their consistent output. The great thing about LED light is that it can be controlled in terms

of brightness and color temperature, which makes it flexible. If you are using artificial light for the first time, it might be easier to start with LED lights.

Another type of artificial light is the studio strobe flash. This gives a short but very strong burst of light. The power level of the light can be adjusted usually.

Studio strobes need external power supplies and may need some more training, in order to use. Finally, the built-in flash is also a form of artificial light, that exists on your camera.

Some camera flashes are very powerful and can light up a room brightly. However, these flashes tend to be very hard and not easily adjustable. Some come with diffusers to soften the light, but ultimately,

external lighting is often going to give you more control and give you a better final product.
I will usually look at the size and scope of the room first. This is essential in figuring out which light sources to use. For a smaller room, I am probably not going to use a large softbox light.

I may just use a small LED light or a camera flash with some kind of diffuser. A big living room will need a lot more lighting to fill in the space. It may also depend on the height of the ceiling.

Rooms with high ceilings mean you will have to place the lighting equipment high enough in order for them to be effective. If the room has very little natural light, artificial lighting is going to

be the key to lighting up the room and bringing out the appeal of the room design.

Remember that with artificial light, you can even control the color tone of the room, to the temperature you would prefer. It’s important to note that you will have to be familiar and comfortable

with post-processing of any images you take with artificial light.
Color Temperature and White Balance
Color temperature (measured in Kelvin) describes the warmth or coolness of a light source. This is one of the most important concepts to keep in mind when it comes to photography. Warmer light have a lower Kelvin value (around 2000-3000K), and is usually described as golden, or candlelight. Cool light, or daylight, tends to have a higher kelvin value (5000-6500k). In order to use any source of light correctly, one must understand color temperature. If you mix a variety of different light temperatures, you will find that your final image will look off. The other concept you should be aware of is white balance, which is the process of adjusting the colors in your image so that white areas appear white.
What I have found most important while learning about color temperature is how much of a difference it makes in real estate photography. For interior scenes, you want a consistent and neutral color temperature to allow a true representation of the physical structure. I would usually set any artificial lights I use between 4000K to 5000K. When mixing natural and artificial light, you should try to get them to match as closely as possible or this can cause a weird color look. To do this, you want to see the color temperature of the natural light (use the camera or light meters), and adjust the artificial lights accordingly. White balance can then be set in camera, or adjusted during post production. As a general tip, I find that shooting in RAW gives me more flexibility to adjust the colors, without any color information being removed. The best tip I can give you is to always be aware of light temperature and white balance while shooting. This way you will save a lot of time and effort in post-processing.
Techniques for Blending Natural and Artificial Light
The challenge in real estate photography is often not to eliminate dark areas, but to create a photograph that looks natural, and has a good amount of exposure. To truly succeed, you must be able to blend artificial and natural light seamlessly. This can be done with various techniques. One of the best techniques to use is called “light painting”. This involves using a handheld light source to individually fill in shadows. This can be done on multiple images and blended together in post-processing using masking techniques. Another technique is using multiple light sources on different areas. You can use an artificial light to fill in shadows in the main areas, while letting the natural light do its magic in other areas, like the windows. It will often require a few tries to get it right. Your artificial lights should be used to only compliment the natural lights, and not overpower it. This will help produce a very natural and well-exposed picture.
My favorite technique is to think of artificial light as a “filler” light. I don't use it to replace natural light. Instead, I look at areas the natural light is missing, and add artificial light to them. It helps if you know where the shadows and darker spots are. You also want to use your light modifiers to soften the light to help blend it with the natural light. This usually means using a light diffuser or soft box. Experiment with the power output on your artificial lighting is essential in achieving this blended look. A little bit goes a long way. The goal is to get an image where the shadows are not too harsh, and the highlights are not overexposed. The key to a seamless blend is careful observation, and proper experience working with artificial and natural light.
Overcoming High Dynamic Range Challenges

Real Estate Photography
The human eye is inherently good at perceiving details in both very bright and very dark areas simultaneously. Cameras, however, are not. This is called dynamic range. High dynamic range (HDR) situations occur when the difference between the brightest and darkest parts of a scene exceeds the sensor’s capability. This is common in real estate photography where there are both brightly lit windows and dimly lit interior spaces in the same photo. Capturing these images well requires skill and specific techniques.
Exposure Bracketing and HDR Techniques
Exposure bracketing is a technique where you capture the same scene of a property at multiple exposure levels. For example, you may take three shots; one that is under-exposed, one that is correctly exposed, and another that is over-exposed. This is particularly useful as it allows you to capture both the bright and dark areas. When you take these multiple exposures you can merge them into a single HDR image. In camera, the HDR function will combine these different exposures and give you a complete image. You can also post-process these images on your own, using software like Photoshop or Lightroom. When I first started, I used to just rely on in-camera HDR. I would find that this method does not give the best control, and that I preferred taking a couple different exposures manually and processing them myself. I found this gives me more control over the end result.
Manual HDR workflow also means I have a lot more freedom to choose what parts of the image I want each exposure to come from. There are cases where the in-camera HDR function will make some strange choices in terms of how it blends the image. One tip that I have is to ensure that you use a tripod when you take your exposures, so that the images that you combine are aligned perfectly. The best tip I have for you is to practice and learn how using different lighting situations affects the dynamic range of images. Once you become familiar with it, it becomes a very simple process.
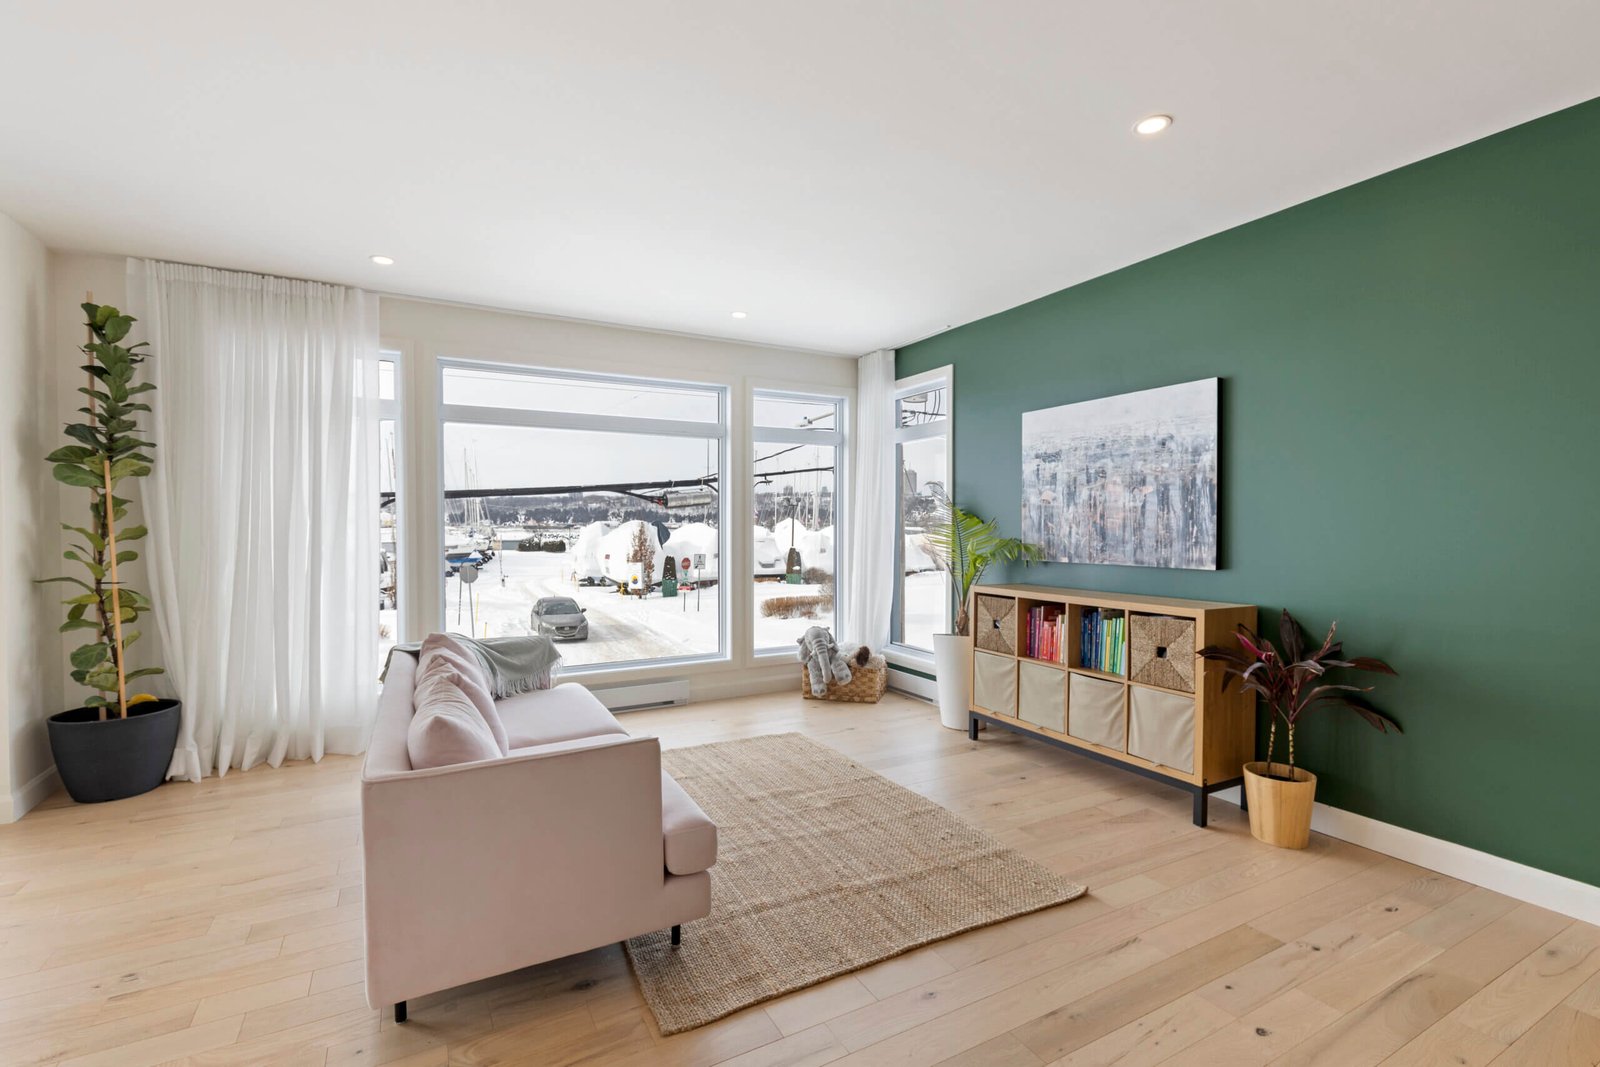
Dealing with Overexposed Windows
Overexposed windows are one of the most common challenges in real estate photography. When you expose correctly for the interior, the windows, and the sky outside will be completely washed out. Using HDR technique is very useful in this case. Another effective technique is to shoot multiple images and blend them in. With post-processing, you can also use layer masks to select parts of images you want to combine. If the windows or sky are too overexposed, it may be hard to get any details. You may have to come back when the light outside matches the inside lighting. This will give you a better photo that is more balanced.
I have personally found that the position and framing of the windows has a big effect on it being over exposed. If the window is not in direct sunlight, there will be a lot less overexposure. Also, the quality of the glass within the window will also determine how much light is shining through. You will need to consider all of these aspects when shooting real estate properties. I’ve made the mistake in the past of not being careful of exposure, and had to spend extra time trying to fix the image. It was not as clean as if I would have corrected it during shooting. Be very meticulous about this, and your photographs will greatly benefit from it.
Minimizing Shadows and Enhancing Details
Shadows are a natural part of photography. But harsh shadows can create a flat image that lacks contrast. The key to handling shadows is not to eliminate them completely, but to minimize their impact while enhancing the details in the shadow area. Using fill flash, artificial lights and reflectors to bounce light into shadowy regions help soften the edges, and bring out the details. Pay attention to how shadows affect the composition and the overall mood of the picture you are trying to achieve, and adjust your lighting equipment accordingly.
Something that I consider when managing shadows is also how much lighting there is in the space, and what’s causing the shadows. If it’s natural light, then you may have to wait till the light is a bit milder, or adjust your position to avoid these shadowy conditions. If it’s artificial light, then you can adjust the positioning or the use of diffusers. Once you gain experience working with lighting, you will be able to intuitively figure out how to manage shadows in any space. Always remember to assess, adjust, and then capture those images.
Leveraging Post-Processing for Lighting Adjustments
Post-processing is an integral part of modern real estate photography. While getting it right during the shoot is always the goal, post-processing allows for further refinements and adjustments to make sure you have a professional looking image. It is important to keep in mind that post-processing should not be used to compensate for poor images. Rather, it should be used to bring the best out of all images, and to make sure that the colors are perfect.
Basic Color and Exposure Adjustments
Basic color and exposure adjustments are the first essential steps in post-processing. You will want to ensure the white balance is correct so that the colors are accurately shown. The exposure can then be adjusted so the image is bright enough and nothing is too dark or light. Software like Lightroom and Adobe Camera RAW are very helpful for these types of adjustments. Small changes in these settings can drastically impact the overall image. This is why it’s good practice to experiment, and familiarize yourself with the color, exposure and tone controls.
Personally, I will always start with the color, and making sure that the color temperature is accurate. I want the colors to represent the true look and feel of the space. I’ll then look at the highlights and shadow levels to ensure that shadows and bright areas are not overly clipped, and adjust the exposure. Don't go too aggressive with these settings. Just make the adjustments, and give every image the best look it can have. The goal is to have a realistic looking image and not something that is obviously "photoshopped" or altered. These basic adjustments are important in setting up the rest of post-processing workflow.
Correcting Lens Distortions and Perspective
Lens distortion is a common issue when using wide angle lenses, which are often necessary for real estate photography. The edges of the image can appear curved, and vertical lines appear to be tilting. Post-processing softwares give effective tools in correcting such distortions and adjusting the perspective of your images. You can tell programs that the image is architectural, and have it automatically correct the issue. But you can also do it manually, by rotating and adjusting perspective. This should be done after exposure and color adjustments. It’s also important to crop your image into the right aspect ratio, so that it looks good when it is displayed to your client. The goal is always to make the image look as good as it can be.
I’ve always had a keen interest in how perspective affects an image. Lens distortion can make a room look awkward or unnatural. I always go straight ahead and check if any lines are not vertical or horizontal by nature. This usually means that some adjustments will be needed. By keeping the line straight, you will give the best visual presentation of the space for your potential client. By carefully correcting these small things, it enhances the professionalism of the image. Perspective adjustment is something that should be in your normal post processing routine.
Advanced Editing Techniques and Retouching
Advanced editing techniques can make the real difference between a good real estate photo and a truly remarkable one. Some techniques include removing unwanted items within the photos, or retouching small imperfections in the wall or flooring. If the sky is dull, you can also replace the sky with better version, or add a sun flare to enhance the visual appeal. Sometimes, I need to adjust the tones of the wall to avoid the image appearing flat. By using techniques, like curves and masking, I can modify the bright and dark areas individually. By using these small but impactful techniques, you will take your real estate photography to the next level.
These techniques do require a bit of learning and practice. But it has been a learning experience that I have truly enjoyed. One small tip I have during post-processing is to ensure that you don’t remove the imperfections that are part of the property, since they are part if the reality. The most important thing is that you ensure that you make the property look as appealing and natural as possible, with all the right lighting, without looking fake. Having that professional quality is key.
Effective Techniques for Outdoor and Twilight Photography
Real Estate Photography
Outdoor photography, especially at twilight, presents its own unique opportunities and challenges in real estate photography. Capturing the beauty of a property at sunset or under the starry night can create a lasting impression on potential buyers. This requires a different approach to lighting and exposure than what you may be used to. By mastering these techniques, your are able to showcase your property in the best conditions.
Capturing the Magic of Golden Hour
While we discussed golden hour earlier, understanding how to master it is a slightly different skill. Shooting for that golden light is about more than just light. It’s about capturing a unique mood. To capture the property, you want to shoot from angles that have the sun shining on it sideways, this creates a mood that is unique to golden hour. You also want to ensure that you have a good exposure and that the image detail is preserved. This is also an ideal time to capture blue hour photographs that have that deep blue sky to add to a real estate exterior picture.
My ideal approach is to look at the property at various times prior to the official shoot to get a feel of how the light hits the different surfaces. I also think about how I can position myself to make the most out of this lighting. Try to shoot various types of framing, to capture the property in its best light. It allows me to bring out the best in images, and to truly emphasize the beauty of the property. Make sure that you are prepared to work quickly, as golden hour light only lasts for a short period of time.
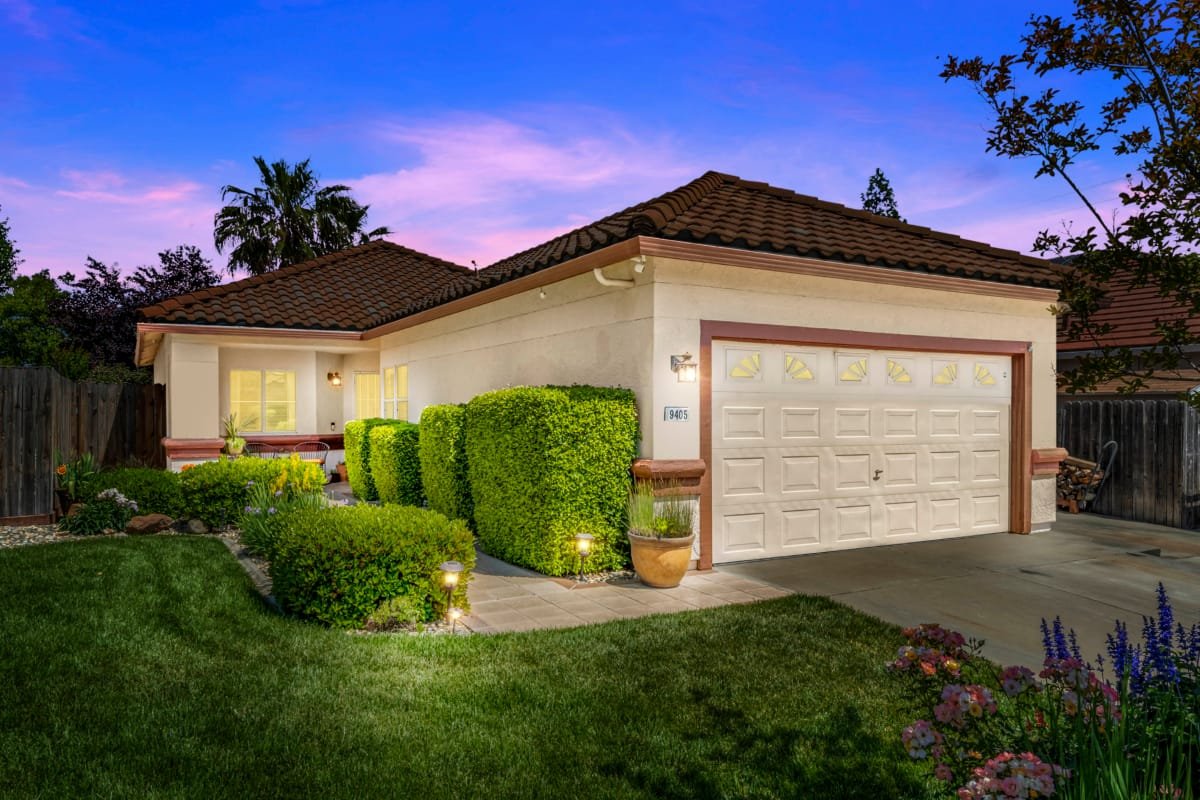
Twilight Photography and Blue Hour
Twilight photography, especially during the blue hour (the period after sunset and before it gets dark, when the light has a deep blue color) is a great way to create dramatic and captivating real estate images. During this twilight period, the properties can look very inviting and appealing to potential buyers. To make them look their best, you should be aware of the natural light, and how to combine with artificial indoor lights. Having a plan is important since the blue hour is short, and you don’t want to waste time by trying techniques that may not work on the spot.
In my experience, you must position yourself at different angles to capture as much light as possible. Take multiple exposures if needed but try to be as efficient as possible to save time. I also bring an external light source to light up the foreground or any darker areas, to balance the image with the sky. Consider that any internal lighting within the property becomes very important, as this will be the dominant light source during the blue hour. Ensure that you communicate with the owners, so that they keep the lights on throughout the shooting period, to maintain consistency. Keep an eye on the sky, and make sure to keep the image quality high.
Dealing with Outdoor Lighting for Property Exteriors
Outdoor lighting for real estate involves being aware of the direction of light, shadows, and how it affects the property. The position and framing of the property make a big difference in creating a powerful image. The best thing to do is scout ahead, and figure out the best angle. Sometimes you may need to change location and shoot from a different angle. By keeping an eye to the details, you make sure every exterior image is presented in its best form.
What I have found to be the most interesting is how different types of materials, react to lighting differently. For example, houses with bricks and stones absorb light and react differently compared to houses with vinyl or wood sidings. Knowing how these materials react to light when you are shooting will help greatly on capturing the most appealing photos. If your images are too dark, or lack contrast, you can try using a reflector to bounce light into dark areas. It makes all the difference when you are dealing with outdoor property shoots. A proper understanding and using an effective lighting strategy is the key when shooting exterior shots.
Conclusion
Mastering challenging lighting in Real Estate Photography is a continuous process of learning and adaptation. It requires not only technical knowledge but also a great degree of creative perception and attention to detail. By understanding the nuances of natural and artificial light, mastering HDR techniques, and leveraging post-processing, you can overcome any lighting challenge and present every property in its most appealing way. The key is to adapt, learn, and experiment, and never stop pushing the limits of your photography.
Contact me for the best real estate photo editing service.


