

How to Create a Seamless Workflow for Real Estate Photography
Real Estate Photography is more than just pointing a camera at a house; it’s about capturing the essence of a space and translating it into compelling visuals that resonate with potential buyers. In today’s competitive market, a streamlined workflow is essential for consistently delivering high-quality images, managing your time efficiently, and ultimately, growing your business. This comprehensive guide will explore each facet of a robust workflow designed to maximize your success in real estate photography.
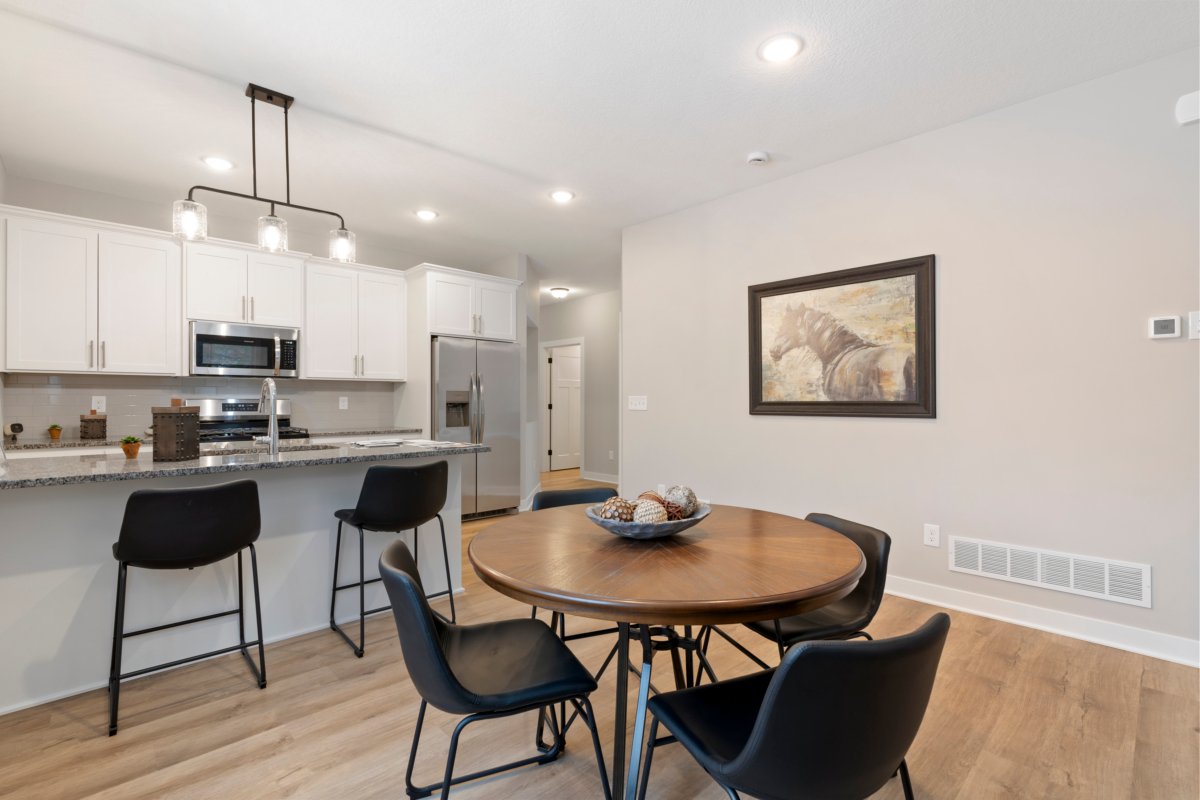
Pre-Shoot Planning & Preparation

Real Estate Photography
Before even lifting your camera, meticulous planning is the cornerstone of a smooth and efficient shoot. This stage, often overlooked, sets the stage for a successful day and determines the final quality of your images. A lack of preparation can translate to missed angles, forgotten equipment, and ultimately, a less-than-ideal client experience. This section details the essential steps for preparing for your real estate photography shoots.
Client Communication & Expectations
Effective communication with your client, whether that’s a realtor, property owner, or property management company is absolutely paramount. It starts with a clear understanding of their expectations and the specific goals for the shoot. Do they want a bright, airy feel? Or a cozy, warm ambiance? Understanding their needs will allow you to tailor your photographic approach. Going beyond simply discussing the number of photos or their preferred delivery time frame is vital. Ask about specific features of the property that they want to highlight, whether that be a newly renovated kitchen, a sprawling garden, or a breathtaking view. Discussing timelines, access to the property, potential staging needs, and any specific requests, such as including local highlights, should all be handled during this preliminary conversation. Failing to discuss these items initially can lead to unmet expectations and time-consuming revisions down the line.
Clear communication often translates directly to smooth execution on the day of the shoot since everyone understands the intention behind the visual storytelling. This clarity benefits you and it creates a sense of trust in your clients, positioning you not just as a photographer, but as a collaborative partner working to showcase the property in the best possible way. I’ve personally found that having a detailed questionnaire or brief form for clients to fill out before our initial call can be incredibly useful. This information prepares me for the conversation and helps me to ask even more specific questions. This approach allows for far more direct and impactful photo shoots.
Furthermore, take the time to explain how your photographic style differs from the competition: perhaps you specialize in HDR work, have a signature way of shooting bright windows, or use a specific style of colour grading. Presenting this information helps set expectations so your client understands your abilities and how you can make their property stand out. The importance of managing client expectations cannot be overstated, and setting out clear criteria at the start will ensure far better results for all involved and leads to repeat business.
Equipment Check & Preparation
Before any shoot – and I mean before any shoot – meticulously checking your equipment should become an ingrained habit. This process should never be skipped. You don’t want to find out that a key piece of equipment isn’t working right or is missing on location, resulting in delays or missed opportunities. Start with your camera. Check the battery charge and have spare, fully charged batteries on hand. Examine your memory cards. Ensure they are formatted and have sufficient space for the shoot. It sounds rudimentary but having these key bits ready to go before heading on site is really key to a smooth shoot. If you rely on external flashes, test them and pack extra batteries. This doesn’t only cover your equipment, have a checklist for your car as well. Make sure you have cleaning kits: lens cloths, a blower brush, and so on. Even the smallest dust spots can be detrimental to final images. Don’t forget your tripod, essential for capturing crisp interior shots. Double check it’s stable and that it’s the right height for the shoot location. And speaking of locations, don’t forget your keys and access codes for the building. I’ve had enough frustrating times where I’ve ended up waiting to get access to a property, so now I always triple-check this!
Beyond essentials consider packing some ‘just in case’ items. It may be some gaffer tape, an extension cord, a set of allen keys, or a small level. What other tools may help you manage the shoot effectively? These small details contribute directly to your professional efficiency, help solve on-the-fly problems on location and make you look like you know your stuff, which you do! Creating a detailed checklist can be a life saver, particularly as you gain more clients and may have multiple shoots in one week. Consider a digital checklist via your smart phone to add an easy way to run through items without forgetting. This regular check will not only save time on your shoot but will also contribute to a stress-free experience where the technical aspects do not distract from your artistic vision. When you feel confident that every piece of your gear is ready to go, your creative mind is more aligned to capturing the best possible shots. This focus is critical.
Scouting the Location (if possible)
Whenever the opportunity presents itself, and ideally always if possible, scouting the location prior to the actual photo shoot is an invaluable step. This first look allows you to familiarize yourself with the property’s layout, identifies areas needing special attention, and gets a feel for the direction of natural light. Note the unique characteristics of the property, architectural details, and features that the client highlighted. Scouting enables you to pre-plan your camera angles and decide where to set up for that perfect shot. It can make a big difference to see the areas that get great natural light and those that will need more creative lighting solutions ahead of time. Understanding the flow of the property also means you can move through the space more efficiently on the day of the shoot. Time, after all, is typically of the essence.
If physical scouting isn’t feasible, maybe due to location or time constraints, consider using online tools like Google Maps and Street View. They’re really useful for getting an understanding of the location. At the very least, review the client’s supplied materials, such as floor plans and prior photos. These resources can give you a basic layout of the property. Take some time to study them and start to envision your photos. Pay attention to elements like existing lighting fixtures and the kind of natural light the property gets as well, as this helps inform any lighting equipment you may need. I have found that scouting, whether virtual or in person, significantly reduces the number of unexpected challenges on shoot day, leading to a smoother workflow and better final images. All this preparation and planning beforehand means that the shoot day feels more creative, less stressful, and far more enjoyable, which means you usually get the best shots!
The Photography Process
With all the pre-planning done, now’s the time to think about the photography itself. Approaching a shoot with a clear strategy allows the photography itself, the image capture, to be faster, more considered, and ultimately far more effective. Having technical ability is just one side of real estate photography; creative direction and the ability to make decisions quickly and execute them smoothly is what separates an ordinary shoot from an outstanding one. Remember that each property offers its own unique set of challenges, opportunities, and ultimately, its own story.
Capturing the Best Angles and Composition
One of the biggest visual differences in real estate photography comes down to creative decision making around camera angles and compositions. Going beyond simply capturing a room straight on is vital. Experiment with different vantage points, such as shooting from a corner to showcase more depth or shooting from doorways to frame different areas of the home. Low-angle shots can help to make a space look larger and more inviting, while eye-level shots provide a consistent and familiar perspective of the property. Think about the rule of thirds, leading lines, symmetry, and the various compositional elements to guide the viewer’s eye and highlight specific architectural elements.
Pay close attention to how the available light interacts within the space. Natural light may be your primary source, so try to maximize it where you can. However, be ready to supplement with flash or continuous lighting when natural light is not available. As a photographer, understand how the camera will see the space in comparison to the human eye. The camera uses perspective differently, and what looks great in person may be wonky on camera. This means taking a step back and observing each scene before taking your shots. Do the various elements of the shot work well together, will these be enticing for the viewer of the images?
It’s worth spending just a few minutes looking around the space before each setup. The aim is not to be hasty, but to take a few minutes to pause and consider your options. This will help you understand the space and create the best composition possible. What would make the viewer pause and take a closer look? What is it about this space that is special and needs to be highlighted? These small considerations in shot composition make a direct impact on your images, it’s not just about technical skills, it’s about using them to tell a better story.
Utilizing Natural and Artificial Light
Understanding light is probably the single most valuable skill that a photographer can learn. Mastering how to use natural and artificial light is essential for creating compelling, high-quality real estate images. Natural light is often the preferred choice, for it feels more accessible and real for potential buyers as it naturally enhances colours and gives a sense of space. When using natural light, assess its direction and intensity during different parts of the day, and time your shoots to capture rooms with their best natural exposure. If necessary, use light diffusion or reflection tools to soften or enhance the light, avoid harsh shadows, and manage overexposure from bright windows. These small steps can greatly impact the overall feel of your image.
Artificial light comes to the fore when natural light is insufficient, or when you want a more controlled look in the interiors. Speedlights, strobes, and continuous lights are the most effective tools. Use the equipment sparingly and try to match the colour temperature of your artificial lighting with the ambient light to avoid any unwanted casts. It goes without saying that this takes practice and skill, but it’s totally worth the effort to learn. When using artificial lighting, take time to bounce the light off walls and ceilings to create a soft and even glow throughout the room, avoiding those harsh shadows. I like to use multiple flashes in various locations to achieve a balanced look. There is no one right way to achieve this balance, so always experiment.
When both natural and artificial light together, you may have to employ photographic techniques like HDR (High Dynamic Range) to capture all of the details from the shadows to the highlights effectively. In this process a series of shots that all use different light exposures, are combined during post processing to show the best from each shot. It’s a creative technique that will greatly enhance the final look when done right and is standard fare in real estate photography. Always consider the colour temperature and intensity of both your lights as well as the ambient light in order to achieve a balanced approach.
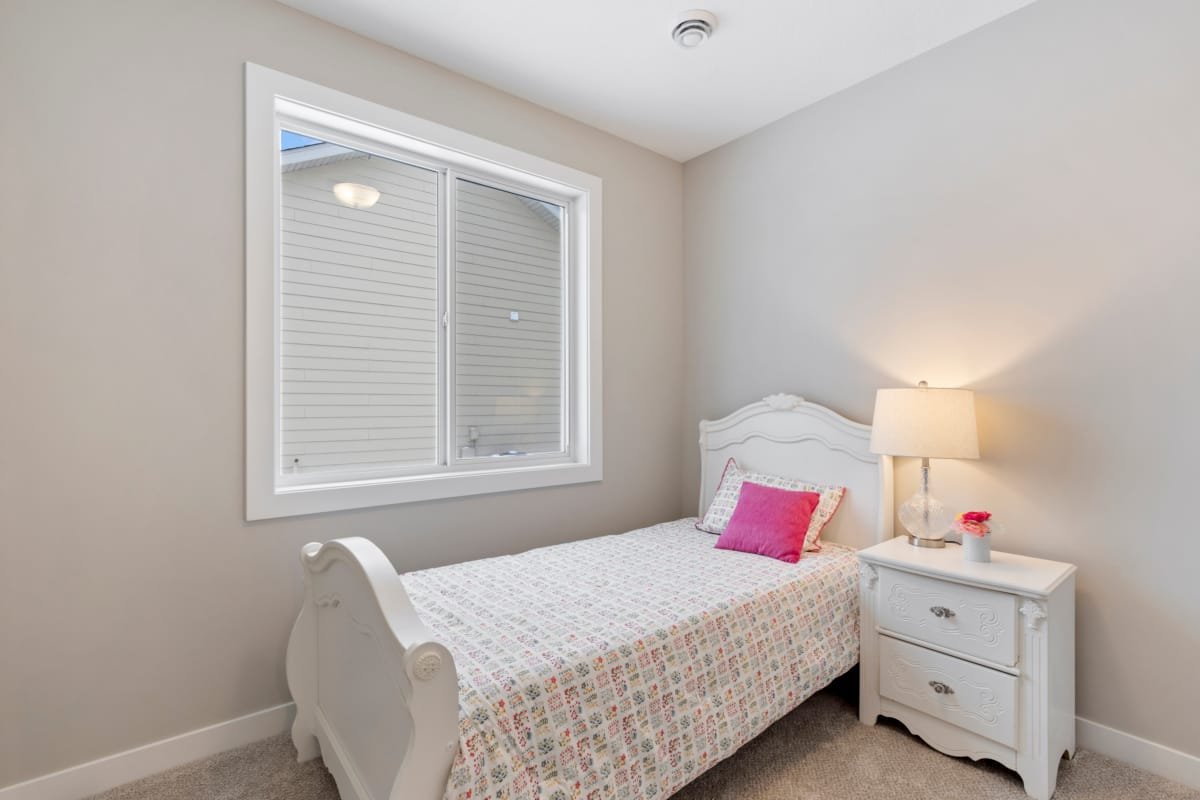
Capturing Key Features and Details
While wide-angle shots are crucial for showing the scale of rooms, they often do not contain the personality of the space. Close-up shots of key features and details can elevate the appeal of a property, connecting the viewer to a more intimate level than just a simple overview. Highlight things like architectural details such as intricate mouldings, unique light fixtures, or the textures of countertops and fabrics. These close-up shots not only showcase the craftsmanship of the property, they offer another dimension to your visual storytelling. Also consider how these smaller details may tie-in with a larger plan? How do these smaller details enhance the entire experience of a space?
The details will vary from space to space, but consider each room on its merits. When shooting kitchens, pay attention to the hardware, appliances, and the quality of the cabinetry. When shooting bathrooms, highlight tiled backsplashes, designer faucets, or unique shower fixtures. In bedrooms, show off closet space, wall finishes, and the quality of bedding. These small elements can make a huge impact on capturing a potential buyers imagination and making the space feel desirable. The aim is to capture the feel of the space, not just the overview.
Take the time to carefully consider how best to photograph these details, as they can make all the difference in the impact of the shot. Experiment with different angles, lighting, and focal lengths to capture them effectively. This takes time, but with practice you will begin to move quickly from overview to creative detail shots. Remember that these smaller details contribute directly to the emotional connection with the property, inviting the potential buyer to imagine themselves living in and using the space. The aim is to move beyond simply seeing images to actually imagining yourself in that space and how you might enjoy living in it. When done well, this intimate type of imagery greatly enhances your overall portfolio.
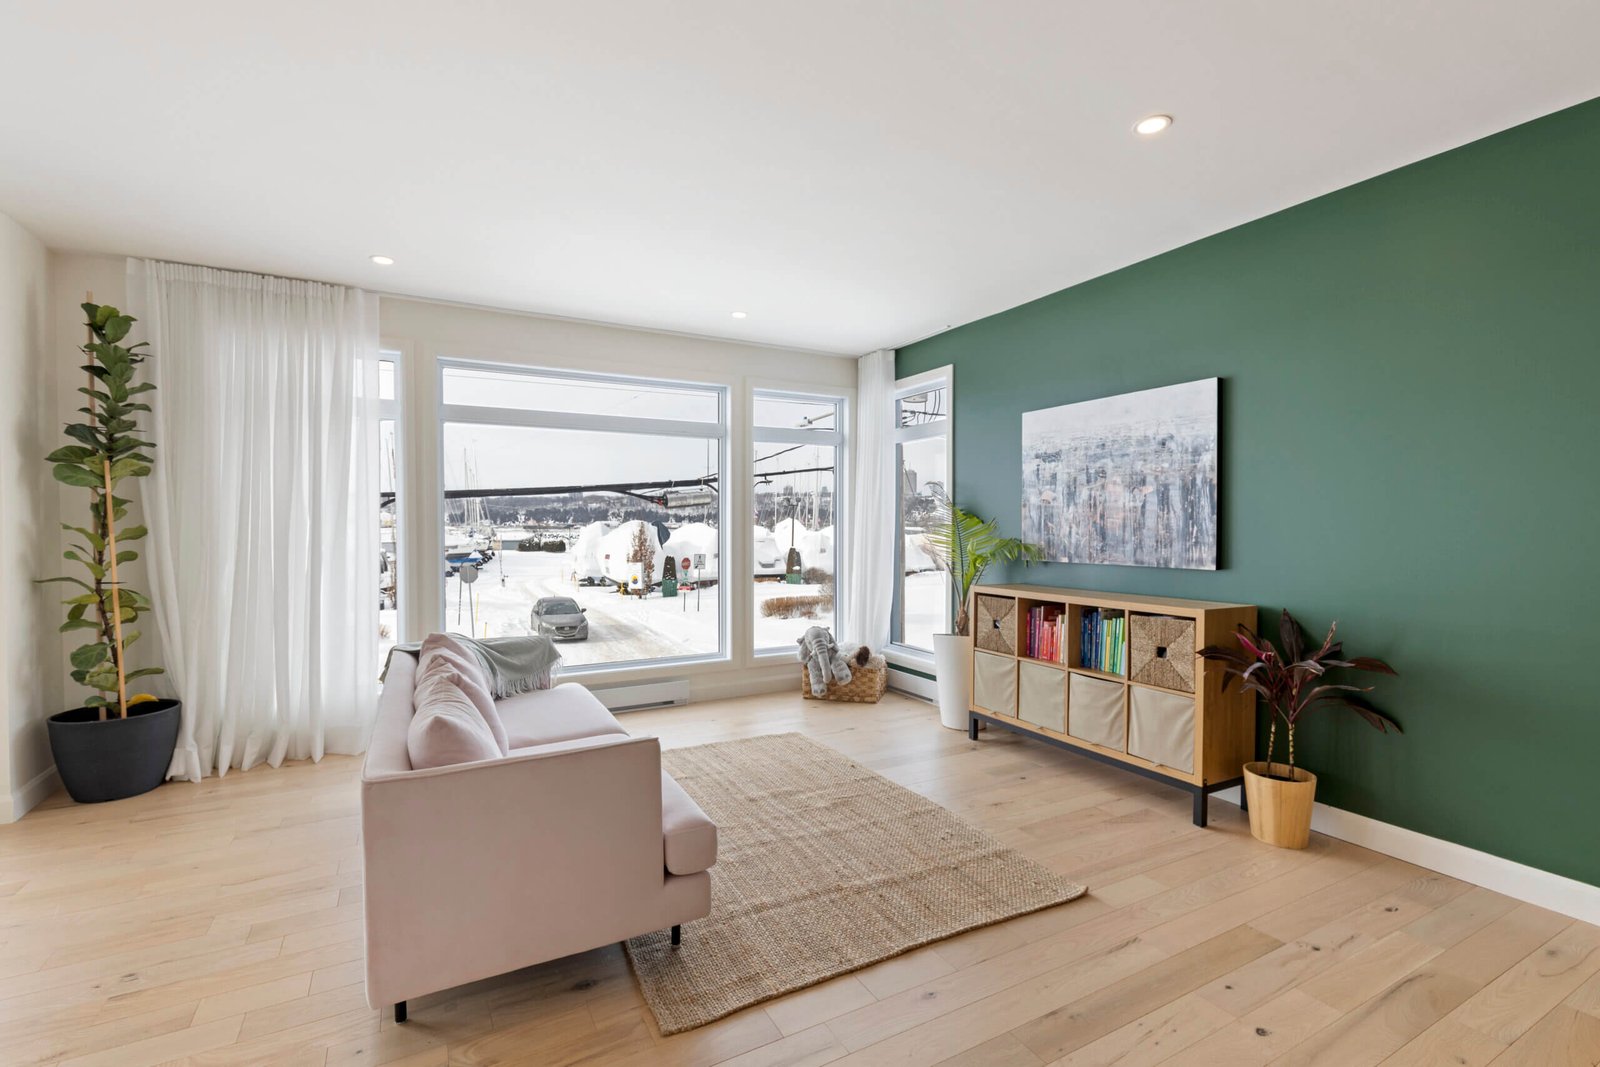
Post-Processing and Editing
Real Estate Photography
The photography process is only half the battle. Post-processing and editing is the next area that determines the final quality of your real estate photography work. It’s where the raw images are enhanced, refined and brought to their full potential. Good post processing will add to the quality of your photography and allows you to truly make the images your own. Consistent processing will also help build your brand and create consistent deliverables for your clientele. A robust post production workflow can streamline the editing process, making it efficient, quick, and enjoyable for any photographer.
Color Correction and Enhancements
Color accuracy is essential when you’re working in real estate photography. This begins with good white balance in-camera, but may need further adjustments in post production. Inconsistent colors can distract from the quality of the properties shown therefore, adjusting the color balance is always a key first step when post processing images. Correct any colour casts that may be caused by artificial light, or unwanted reflections. Pay close attention to the skin tones in any photos where you might have included people. This will make your images look consistent and far more professional.
Also consider the depth and saturation of your colours. Adjusting the saturation to enhance the vibrancy without making the photo look unnatural is key to a high quality final image. The use of selective colour adjustments can be really powerful when used sparingly, highlighting certain elements within the property. For example, you may slightly increase the saturation of a stunning green landscape seen through a window. However, always be wary of overdoing these types of effects, as it can be distracting and create an overall sense of artificiality. The aim is always to showcase the property as it best appears in real life, adding minor enhancements that elevate the shots without it looking too far from reality.
In conjunction with colour and saturation, contrast adjustments can make a huge impact, and increase the visual appeal within your images. Adjust levels and curves to enhance the depth and dynamic range of an image in a controlled manner. Corrected colours, contrast, and saturation are not only an essential step in the post production process, they are key to producing images that are not only accurate but enticing to prospective buyers and stand out head-and-shoulders above images that have not been given any thought or attention.
Correcting Perspective and Distortion
Architectural photography often suffers from perspective distortion; that is, things may bend when photographed with a wide angle lenses. One of the best ways of fixing skewed lines is using perspective correction tools during post-processing. Correcting vertical and horizontal lines ensures your images are more accurate to the natural representation of the property you are shooting. It may seem like a small difference, but straight lines are key when representing a modern home.
Barrel distortion, which is when straight lines seem to curve outwards from the center, can often occur when using ultra-wide-angle lenses and should be corrected where required. Use lens correction profiles specific to your camera and lens or carefully use manual adjustment tools to straighten curves and ensure that the image looks natural and symmetrical. Attention to these minor details will make your images look more professional. While straight lines are incredibly important, also consider the creative aspects of these techniques. When might using this distortion creatively be helpful? Or when might bending the rules of perspective make your images more interesting?
When the photos have the correct perspective, they feel more honest and represent the property more reliably, so this is an extremely important procedure. These types of corrections, however, can be time-intensive so it’s important to implement a system that works and try to correct this type of issue as much as possible when you’re on site during the photography. Understanding how to manage these types of corrections in post production is an essential step for any photographers creating imagery around properties.
Removing Imperfections and Enhancing Details
Finally, no set of images is complete without a final look at retouching. There are always imperfections to remove, those final tweaks and fixes that add that extra layer of polishing to the images. In real estate images, it may be removing unwanted items like a power cable sticking out from behind an armchair or reflections that detract from the image. Pay careful attention to any distracting elements you want to be rid of. You may have small amounts of dust on the lens that is showing up in the images. Spend adequate time removing all of these unwanted elements from the final photo.
Furthermore, consider adding targeted sharpening to enhance the fine details in furniture, textures, or other key elements. Be aware of the dangers of over-sharpening, as this technique can produce a detrimental effect by making the image noisy and unnatural. Using the various masks tools available in post processing apps allows for precision based sharpening, something that is incredibly important in the final stages of post production. Often the final 5-10% of polishing can really add a depth of improvement so don’t rush the retouching.
Adding enhancements to the details, such as a brighter image in a dark corner, or a greater highlight on the unique shape of a piece of architecture, will bring the photos to life and make the image far more appealing. These final touches of editing, even if they are very minor, are crucial for the quality of final output. These small details can make a significant impact on the quality and attractiveness of the photo. When you carefully consider the entire retouching and perfecting process, your real estate photography portfolio will feel professional and of an incredibly high quality.
File Management and Delivery
With post processing finished, it is now time to move on to the stage of file management and delivery. A disorganized filing system during production makes it tricky to find your files. You may have multiple clients and multiple property shoots each week so the correct naming conventions and archiving will make your life much easier. Then, on the delivery side, creating easy channels for sharing large files is also critical. Your real estate photography workflow needs proper attention to this final phase. A solid system will reduce time, effort, and provide your clients with an experience that is streamlined and efficient, from start to finish. This section explores the various elements of file management and the client delivery process.
Organizing and Naming Files
With multiple locations and multiple shoots, establishing a well-thought-out system for organizing and naming files is essential for seamless management of images. Begin by creating a clear folder structure, breaking folders down by client, date, and location. Using a simple folder naming convention, such as year/month/day as the start of your folder name will help make it very easy to search for work. When naming files, use a consistent method that includes details such as the location, the room, or a sequence number such as; ‘Client name_Property address_Kitchen-01’. As you start to create archives of your imagery this clear set of file and folder names will make it much easier to search and find work.
Furthermore, use batch renaming softwares during export to efficiently name files. Don’t rely on the default naming system that the camera uses. This helps to streamline your workflow and reduce errors when you’re organising large amounts of images at once. Also add keywords and tags to your files. This assists faster sorting and searching for work in the future, especially as you build your archive to a large size. This consistent method of naming and organizing both files, and folder will help manage your work effectively over time and when scaled up. Not only does this help you navigate your archives, it provides an air of professionalism to your work.
Take the time to create a systematic process. It will pay off in spades as your volume of work increases. It will reduce time during the editing process and provide less hassle when searching older jobs. The small amount of extra time you spend here is absolutely worth the added effort it saves you during production. When you add this step to each and every one of your shoots, you’ll see a dramatic improvement in the ease of use of your archives. This makes the entire process far more efficient and streamlined.
Choosing the Right Export Settings
Choosing the right format, size and resolution for your exported images for different needs in real estate photography, is critical. Large size high resolution images are typically great for print and should be available as an option for your client upon request. However, these files are far too large to be shared online. Optimizing your photos for digital use is a necessary part of this process. When exporting for online usage, reduce the image file size without compromising the image quality to ensure smooth online viewing experiences for your customers, for online viewing on websites or social media. Ensure that the images are clear, crisp and optimized for online sharing on various devices.
The standard image file format is JPEG, which balances a small file size alongside great image quality. This standard format is best used for final online images. Always keep a copy of your original RAW image files for future editing or archival. If you are creating any animated images, or panoramas, consider using different output formats. Make sure you have an understanding of file types and how they work and what format and size of file may be useful. When you consider the output of your work carefully, it will make your images far easier to use for your clients.
Taking a very granular approached to the different needs your client has for the photos will improve the overall usefulness of your work. It may take some time to refine but will pay massive dividends in the long run to ensure that your images are prepared for the purpose they will eventually be used for. All of this preparation prior to delivery will also give you a professional edge and elevate your services over your competition.
Delivering to Clients Efficiently
Delivering a set of final photos to your clients should be smooth, efficient, and straightforward, and contribute to the overall positive experience when working with you. This begins with selecting the best platform for delivery. Typically large files are difficult to email using standard services. Cloud-based storage services such as Google Drive, Dropbox or specialized photo delivery platforms should be used. These services are designed for handling large files and allowing clients to easily download images from anywhere in the world.
When sharing with your clients, create a direct link to the final files. Make sure you only choose files that have been finalized. Add customized folders with clear names so it is easy for your clients to navigate and find the images they may want. I always add a final overview file for every shoot, so clients are easily able to pick a selection for their own delivery purposes, such as online marketing or printed pieces. Consider also utilizing a branded portal or delivery system, adding logos to your delivery platform, and presenting your work in a more visually attractive way. Always strive to leave a professional impression at each step of the delivery process.
Clear, concise delivery platforms will make your clients’ lives easier. The various options for delivery all have their own pros and cons so always experiment until you find a suitable delivery platform that works most efficiently. When your clients receive their images easily, they will value the simplicity and efficiency that this provides. This positive experience will lead to more repeat business in the long term. And ultimately, a professional and efficient delivery approach demonstrates your full commitment to client satisfaction.
Marketing & Growth Strategies
Real Estate Photography
Real estate photography is a competitive field, so actively marketing your business and seeking opportunities for growth are both very important. A great portfolio is simply not enough. Knowing how to put your work in front of the right people is a key aspect of making your career a success. This part of the workflow is ongoing, continually refined and updated, and ensures that your photography business continues to grow and thrive. Here we’ll look at various ways you can get your business noticed and develop, build upon, and expand your overall strategy.
Building a Compelling Portfolio
Your portfolio is your calling card. Creating a strong and visually captivating portfolio is essential for showcasing your skills and attracting new clients. Your portfolio should demonstrate a range of projects, styles, and visual approaches, so they know that you can handle any kind of work. Select your very best photographs, images that not only look good, but highlight your ability to capture the unique essence of any given property. Always maintain a clean and professional style across your entire portfolio. Make a website or use a recognized portfolio site to showcase your projects.
Regularly update your portfolio with your most recent and best work. Keep a regular schedule for culling photos after each job. I’ve found it incredibly helpful to add one or two new images each week to keep things fresh. This constant addition keeps prospective clients engaged as well as encouraging repeat clients to see what new and exciting photography you have created. Also pay specific attention to the layout of your portfolio. It should be easy to navigate, present well across any device (such as phone, tablet, or computer), and be a fast loading site for anyone visiting.
A strong portfolio is the first point of contact with a new client so it has to be an accurate representation of your style and approach. Your clients need to see not just what you are currently offering, but what you can potentially deliver with your skillset. When you develop a portfolio that sets you apart from your competition, it becomes a constant lead generating engine, drawing in new clients who admire the quality and style of your photography. This focus on the presentation of your work will attract new and repeat business.
Networking and Client Relationships
Building relationships with real estate agents, interior designers, and property managers is critical for growing your business. Networking with the right people can open new doors. Attend local industry events and workshops, participate in online communities related to real estate, and proactively reach out to real estate professionals through email or LinkedIn. Always start conversations, share your work, and show your genuine interest in their work. This helps to build trust and credibility, and helps to create partnerships. It’s amazing what a little conversation and asking how you might help these clients achieve their goals can bring. Your relationships are as important to your overall business as your actual photo taking capabilities.
Furthermore, take the time to nurture existing client relationships. Seek feedback from clients about your services and use this information to refine your processes. Happy clients usually become a very powerful voice that will help to drive additional business through referrals. Always thank your clients for their business, respond promptly to their questions, and go above and beyond when you can. It’s a nice touch to send them additional small images that you thought may be useful to them. This attention to detail will help you forge a stronger business that will thrive. The key is to see yourself as a collaborative part of your client’s team, as you are a service, they will most likely need often.
Active networking and continued client relations are an absolute key to business development. This is how you establish long term strategic business growth. These ongoing relationships are essential to maintaining and growing a thriving business. When you invest time into developing these partnerships, it elevates your brand and helps you win new contracts.
Utilizing Social Media Strategically
Social media is a key tool to promote your real estate photography services and is often the first place a new client will come into contact with you and your work. The first point of this process is to create and maintain a professional presence across various social media platforms such as Instagram, Pinterest, Facebook and LinkedIn. Share your very best photographs, behind the scenes shots, client testimonials, and any news or tips related to real estate and photography. Always engage with any comments and messages that you receive. This attention helps build a positive following.
Consistency is absolutely key in social media. Develop a content schedule that will enable you to consistently post high quality material and use relevant hashtags to increase your visibility. Consider starting video content, creating quick ‘how to’s’ or ‘day in the life’ snippets that highlight your work. Video content is incredibly popular now and can attract considerable brand awareness through new avenues. These days, social media is an essential part of your overall marketing strategy; without consistent output, you will be ignored. It’s not enough to just create a profile – it must be active and engaging.
Also consider paid advertising campaigns on social media, targeted towards your preferred clients. Using different targeted paid strategies can assist growth and reach new potential clients that you may otherwise have never had the opportunity of working with. However, it’s always really vital to see your social media as a long term project rather than a quick solution. Consistent and targeted effort will help you draw in new clients, increase your reach, and create your own brand voice for your imagery. When used effectively, social media platforms can really take your photography business to the next level.
Conclusion
Developing a seamless workflow for real estate photography is an essential and ongoing process which combines meticulous pre-planning with creative execution, precise post-processing, and effective client management, all supported by robust marketing efforts. By taking your time to develop and hone each aspect of this overall strategy, your business will thrive and grow. Each of the above elements works together to raise your work over and above the standard, creating high quality and consistently professional results. When you focus on refining your systems and processes your business will flourish, adding long term stability and continued growth.
Contact me for the best real estate photo editing service.


